
Apr 4, 2026
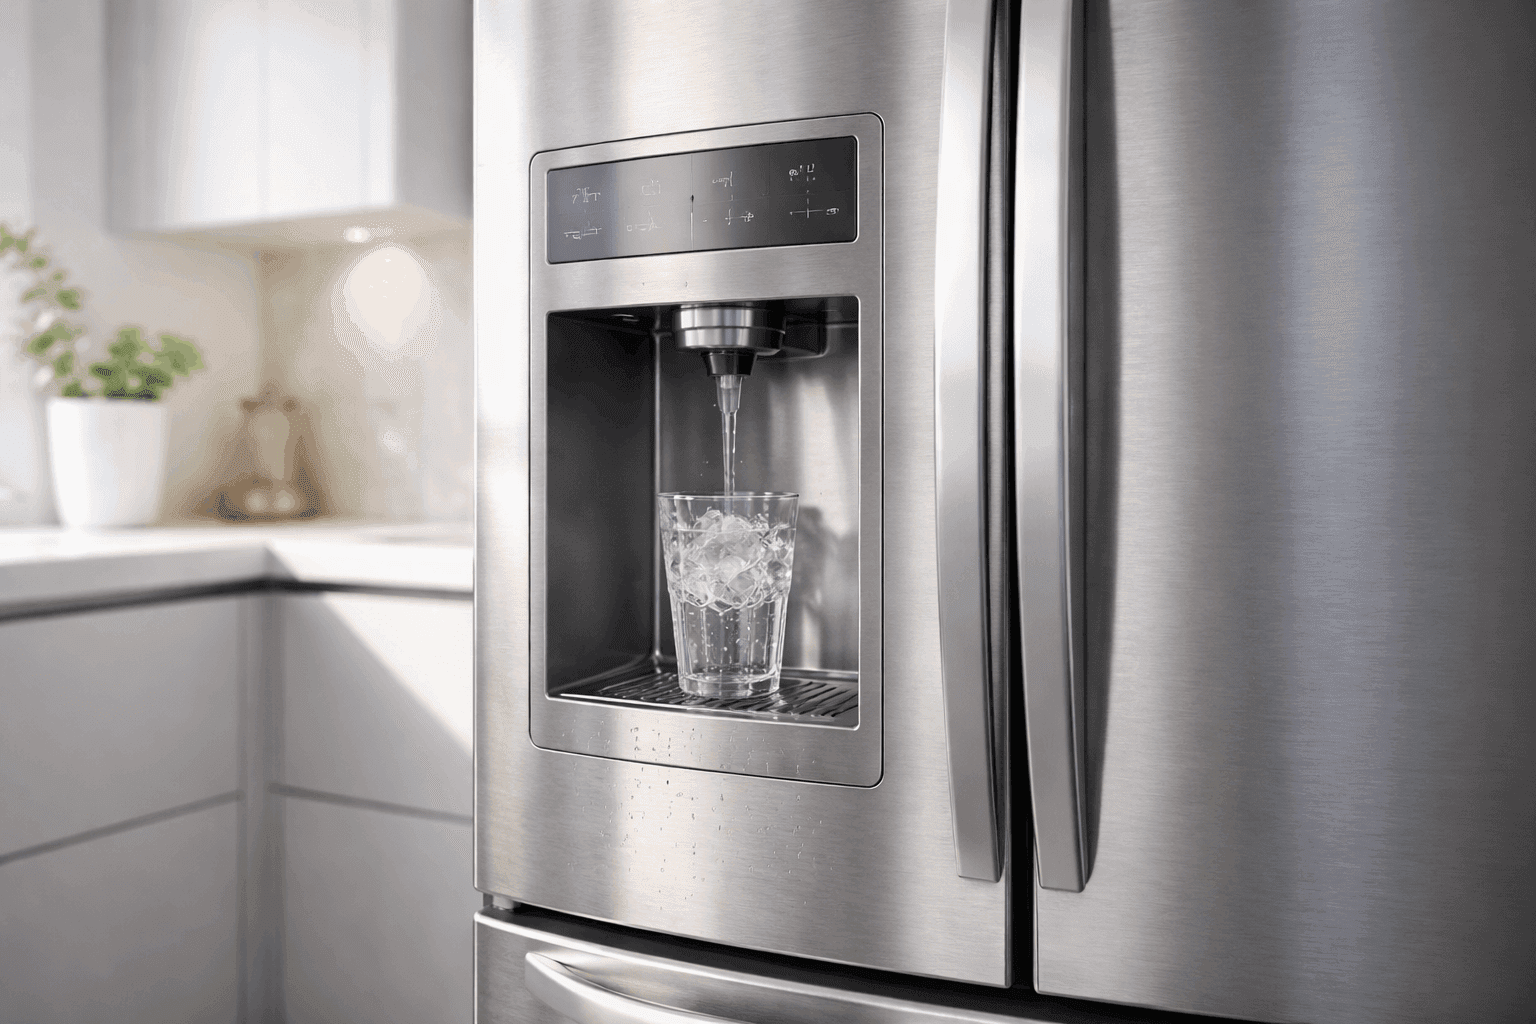
A fridge water dispenser that slows to a trickle or stops completely is one of those small annoyances that somehow feels massive at 7 a.m.
The good news: most cases come down to a handful of causes, and you can sort them out yourself in under an hour.
Work through these in order. The fixes at the top take 30 seconds; the ones at the bottom take a bit more effort.
Unplug the Fridge and Close the Water Valve Before You Start
If you need to inspect electrical parts or disconnect water lines, unplug the fridge first. For anything involving the water connection itself, close the shut-off valve behind the fridge (or under a nearby sink). A screwdriver, a multimeter, and a bucket will cover most of what you might need.
3 Settings That Accidentally Disable the Dispenser
Child Lock Is On — Hold the Lock Button for 3 Seconds
Most modern fridges have a child lock or dispenser lock feature. It's easy to enable by accident. Check your control panel for a "Lock" indicator — if it's lit, hold the button for about three seconds to turn it off. Your manual will confirm the exact button combination for your model.
The Door Switch Has Failed and the Fridge Thinks the Door Is Open
The dispenser won't work if the fridge thinks the door is open — and the door switch can fail even when the door looks shut. If your interior light stays on after you close the door, or pressing the door button manually doesn't turn it off, that switch is the problem.
The Shut-Off Valve Behind the Fridge Is Partially Closed
If you recently moved the fridge or had any plumbing work done, double-check that the water supply valve behind the unit is fully open. Even a quarter-turn restriction can noticeably slow down the dispenser.
The Filter Is Clogged — Replace It and Test With the Bypass Plug
A clogged water filter is the single most common cause of slow or stopped water flow. Filters catch sediment and contaminants over time, and eventually they restrict flow so much that almost nothing gets through.
Replace your filter every six months. If you live somewhere with hard water or heavy sediment, you might need to do it sooner. Signs it's time: a "replace filter" light, water that tastes off, or noticeably weak flow.
Not sure if the filter is the culprit? Many fridges (GE models in particular) come with a bypass plug. Pull the filter out, install the plug, and test the dispenser. If the flow jumps back to normal, the filter was the problem.
One more thing: make sure the new filter is fully seated. Most filters need a firm twist until you feel or hear a click. If it's even slightly misaligned, many fridges will stop water flow entirely as a safety measure to prevent leaks.
The Water Line or Reservoir Is Frozen — Thaw It With a Hairdryer
If your freezer is set extremely cold, the water line running through the door or the reservoir behind the crisper drawers can freeze solid. A classic giveaway: the ice maker still works, but the dispenser doesn't. Another sign is a humming sound when you press the paddle with no water coming out — the valve is opening, but ice is blocking the path.
Use a hairdryer on a low setting to warm the line where it enters the door. Be careful around plastic parts. Once things are thawed, bump the freezer temperature up slightly to keep it from happening again.
📖 You might also like to read: Fridge Is Warm but Freezer Is Cold? Here's What's Going On
The Water Line Behind the Fridge Is Kinked or the House Pressure Is Too Low
Pull the fridge away from the wall and look at the flexible plastic tubing connecting it to the wall. These lines kink easily when the fridge gets pushed back too close. If you see a sharp bend or a flattened section, straighten it out and leave a couple of inches of clearance between the fridge and wall going forward.
Water Pressure Is Below 20 psi — Measure With the Cup Test
Refrigerators generally need at least 20 psi to work properly. A quick way to check: dispense water into a measuring cup for 20 seconds. If you get less than 8 ounces, pressure is the issue.
If your fridge is connected to a reverse osmosis system, that can actually drop the pressure too low. In that case, removing the fridge's internal filter can help compensate, since the RO system is already filtering the water.
The Saddle Valve Is Clogged With Sediment — Turn It In and Back Out
Older installations sometimes use a saddle valve — a small piercing valve that clamps onto the water line. These are notorious for clogging over time. Try turning it all the way in and then back out to clear any buildup. If the flow stays weak, a plumber can swap it for a proper ball valve connection.
The Door Switch, Dispenser Switch, or Inlet Valve Has Failed — Test Each With a Multimeter
If there's no sound at all when you press the paddle, something electrical has likely failed.
Door switch: Tests for continuity with a multimeter. No continuity when pressed means the switch is faulty and needs replacing.
Dispenser micro switch: The small switch behind the paddle should click when you press it. No click, or no continuity on the multimeter, means it needs replacing.
Water inlet valve: This is the valve that opens to let water into the fridge. If it buzzes loudly but no water comes through, or if it makes no sound despite having power, it may have failed. Hard water deposits can clog it mechanically, while the solenoid inside can burn out electrically. A continuity test will confirm it.
Brand-Specific Weak Points Worth Knowing
Samsung: Frozen water reservoirs behind the crisper drawers are a recurring complaint. After a filter change, run the dispenser for up to five minutes to purge air — Samsung models typically need longer than other brands.
Whirlpool, Maytag, and KitchenAid: These models are finicky about filter brands. Non-OEM filters frequently cause slow flow or a complete stop. Stick to genuine EveryDrop filters if you're having trouble.
Frigidaire: Water inlet valve failures and frozen lines in the freezer door are the most common complaints, particularly on side-by-side models.
GE: The bypass plug is a genuinely useful diagnostic tool. If you've misplaced yours, you can order a replacement directly from GE.
Flush 2–3 Gallons Through the Dispenser After Any Repair
Any time you replace a filter or disconnect a water line, run about 2–3 gallons through the dispenser before using the water. This clears trapped air (which causes sputtering and dribbling) and flushes loose carbon particles from a new filter. Cloudy water at first is just air bubbles — it clears up quickly.
Call a Professional If You See These Four Signs
Most dispenser issues are DIY-friendly appliance repair, but call a technician if:
Your control panel buttons are unresponsive or behaving erratically (likely a control board issue)
You smell burning or the fridge is tripping your circuit breaker
Water is pooling under the unit and you can't find the source
The low pressure is coming from your home's plumbing, not the fridge itself
In most cases, a fresh filter and a quick settings check will get your dispenser back up and running. Work through the list in order and you'll find the problem faster than you'd expect.
Need an inspection or repair for your freezer or refrigerator?
If your fridge isn’t cooling properly, is leaking water, or keeps making loud noises, the issue may be more than a simple setting or dirty coil. It could be a failing compressor, a faulty thermostat, a clogged drain line, or a bad door seal. To avoid spoiled food and bigger repair costs, it’s best to have a pro check it.
👉 Need a refrigerator diagnostic or repair? Call +18885085008 or book an expert with Fred’s Appliance Repair.
👉 Service areas: Charlotte, Raleigh, Durham, Cary, and Knoxville (North Carolina and Tennessee).

Mar 21, 2026
You open the fridge to grab some milk. It's lukewarm. You check the freezer — ice cream is rock solid. So the freezer works fine. But your refrigerator is not cooling at all.
Sound familiar? You're not alone. This is one of the most common appliance complaints homeowners deal with. The good news? It almost never means your fridge is dead. In most cases, it comes down to a simple airflow or defrost issue — and many of these you can fix yourself.
Let's break it down.
🛠️ Need help with freezer repair in NC or Tennessee? Call +18885085008 or book an expert with Fred’s Appliance Repair.
Why Your Freezer Works but Your Fridge Doesn't Cool
Here's something most people don't know: your fridge doesn't actually create its own cold air.
It borrows cold air from the freezer.
The freezer has evaporator coils that pull heat out of the air and chill it. A fan then pushes that cold air through a vent system into the fresh food section. So the freezer stays cold no matter what, because it sits right next to the source. But if something blocks or breaks the path between the two compartments, warm air gets trapped in the fridge.
That's the core of this problem — every time.
Start Here: The Easy Fixes for When Fridge Is Warm but Freezer (No Tools Needed)
Before assuming something is broken, check these first. You'd be surprised how often one of these is the culprit.
Check Your Air Vents
There are vents on the back wall of your freezer and inside your fridge. These are the passageways cold air travels through. If a bag of frozen peas is sitting right against them, the airflow stops.
Take 60 seconds to look. Make sure nothing is pressed up against the vents. Leave at least an inch of space around them.
Don't Overstuff the Fridge
A packed fridge looks organized. But it can actually stop air from circulating properly. Cold air needs room to move around. If the fridge is stuffed wall to wall, it won't cool evenly.
A good rule: keep your fridge about three-quarters full. That's the sweet spot for both cooling and efficiency.
Check the Temperature Settings
Someone might have bumped the dial when loading groceries. It happens more than you'd think.
Your fridge should be set to around 37°F (3°C). Your freezer should be at 0°F (-18°C). If either is off, reset it and wait a few hours before checking again.
Is the Fridge Sitting Level?
If your refrigerator tilts even slightly, the doors might not seal all the way. Warm air sneaks in constantly. Cold air leaks out. The fridge can't keep up.
Grab a spirit level and set it on top of the fridge. Adjust the front legs if needed. Most models have twist-adjustable feet at the bottom.
Mechanical Problems That Cause a Warm Fridge
If the simple fixes didn't help, something physical is likely failing. Here are the most common parts that break and cause exactly this symptom.
The Evaporator Fan Has Failed
This is the fan inside your freezer that circulates cold air. When it stops working, air stops moving — and the fridge warms up fast.
How to test it: Open the freezer door and find the door switch (usually a small button near the door frame). Press it manually. This tricks the fridge into thinking the door is closed. If you don't hear a fan running, it's likely failed or frozen in place.
A working fan motor typically shows 20–4,000 ohms on a multimeter. No reading at all? The motor is dead and needs replacing.
Signs of a failing evaporator fan:
No airflow coming from fridge vents
Grinding or squealing noise from the freezer
Silence when the compressor is running
The Air Damper Is Stuck Closed
The damper is a small motorized flap that opens to let cold air into the fridge and closes when the right temperature is reached. If it gets stuck in the closed position, no cold air gets through — even if the fan is running perfectly.
You can often hear the fan working but still feel warm air in the fridge. That's a classic sign of a stuck air damper. Inspect it for physical damage or ice buildup. If the motor is dead, the whole assembly needs to be replaced. It's usually a straightforward part swap.
Dirty Condenser Coils
These coils sit on the back or bottom of your fridge and release heat to the outside. Over time, they collect dust, pet hair, and lint. When they're clogged, the whole system works harder and less efficiently.
The freezer stays cold because it's the priority in the cooling cycle. But the fridge starts to warm up as the system struggles to keep up.
Fix: Unplug the fridge. Pull it away from the wall. Vacuum the coils thoroughly. Do this every 6–12 months and you'll prevent a lot of headaches.
The Defrost System: When Ice Becomes the Problem
Most modern fridges are "frost-free." That means they run an automatic defrost cycle to melt ice off the evaporator coils every few hours. If that system fails, ice slowly builds up over days or weeks — until the coils are completely frozen over.
When that happens, air can't flow through them at all. Your freezer still feels cold, but nothing reaches the fridge.
How to Check for This?
Remove the back panel inside your freezer. If you see a thick layer of frost or ice covering the coils, the defrost system has failed.
What breaks in the defrost system:
Defrost heater — the element that melts the frost
Defrost thermostat — monitors coil temperature and triggers the heater
Defrost timer or control board — decides when to run the cycle
The Quick Test: Manual Defrost
Unplug your fridge and leave both doors open for 24–48 hours. Put towels on the floor to catch the water. After it's fully thawed, plug it back in.
If the fridge cools normally again, you've confirmed the defrost system is the problem. The fix is temporary — the ice will come back in a few days. But now you know exactly which part to replace.
📖 Learn how to defrost your freezer
Brand-Specific Issues Worth Knowing
Different brands have known weak points for this exact problem. If your fridge isn't cooling but the freezer is fine, check if your brand has a common culprit.
Samsung Refrigerators
Samsung uses a "Twin Cooling" system with separate evaporators for the fridge and freezer. The fridge evaporator coils are prone to freezing over when the defrost sensor or heater fails.
Watch for error codes like 21E (fan error) or 22E/23E/25E (damper/sensor issues). The damper on many Samsung models also freezes shut due to humidity issues in the design.
LG Refrigerators
LG French door models are very sensitive to where food is placed. Items too close to the rear vents can disrupt airflow entirely. Some LG models have also needed control board software updates to fix defrost logic errors — worth checking with LG support if your model is affected.
Whirlpool, KitchenAid, and Maytag
For these related brands, the air damper assembly is the most common hardware failure when the fridge is warm but the freezer is cold. The damper motor breaks and the door stays permanently shut. Listen for chirping or whirring noises from the fan — that often shows up days before the fan fully fails.
GE Refrigerators
GE models frequently have thermistor failures. The temperature sensor stops sending accurate readings to the control board. The board thinks the fridge is already cold, so it never opens the damper. Replacing the thermistor is usually a quick and affordable fix.
Other Things to Check
The Door Gasket Might Be Leaking
The rubber seal around your fridge door keeps cold air in. If it's torn, warped, or just dirty, warm air leaks in constantly.
Quick test: Close the fridge door on a dollar bill. Try to pull it out. If it slides out easily with no resistance, the seal is weak and needs to be replaced or at least cleaned with warm soapy water.
The Thermistor Might Be Faulty
The thermistor is a small sensor that reads the fridge temperature and tells the control board what to do. If it's giving wrong readings, the system might think it's already cold enough — and never signal the fan or damper to run.
You can test a thermistor by placing it in ice water and checking its resistance with a multimeter. The reading should drop noticeably as it cools. If it stays the same, it's broken.
When to Call a Repair Tech
Most of the fixes above are DIY-friendly. But some situations need a professional.
Call a technician if:
The compressor is making loud buzzing or clicking sounds
You see oily black residue near the back of the fridge (possible refrigerant leak)
You suspect the main control board is faulty
Refrigerant is a regulated substance — you can't legally handle it yourself. And misdiagnosing a control board can cost you hundreds on the wrong part.
Quick Recap
Problem | What to do |
|---|---|
Blocked vents | Rearrange food, leave 1 inch clearance |
Overpacked fridge | Remove items, aim for ¾ full |
Wrong temperature | Reset to 37°F fridge / 0°F freezer |
Unlevel fridge | Adjust feet, check door seal |
Evaporator fan dead | Test with door switch, replace motor |
Damper stuck closed | Inspect and replace assembly |
Dirty condenser coils | Vacuum every 6–12 months |
Iced-over evaporator | Manual defrost, then replace defrost component |
Bad thermistor | Test in ice water, replace if needed |
Torn door gasket | Dollar bill test, clean or replace |
Need an inspection or repair for your freezer or refrigerator?
If your fridge isn’t cooling properly, is leaking water, or keeps making loud noises, the issue may be more than a simple setting or dirty coil. It could be a failing compressor, a faulty thermostat, a clogged drain line, or a bad door seal. To avoid spoiled food and bigger repair costs, it’s best to have a pro check it.
👉 Need a refrigerator diagnostic or repair? Call +18885085008 or book an expert with Fred’s Appliance Repair.
👉 Service areas: Charlotte, Raleigh, Durham, Cary, and Knoxville (North Carolina and Tennessee).

Feb 21, 2026
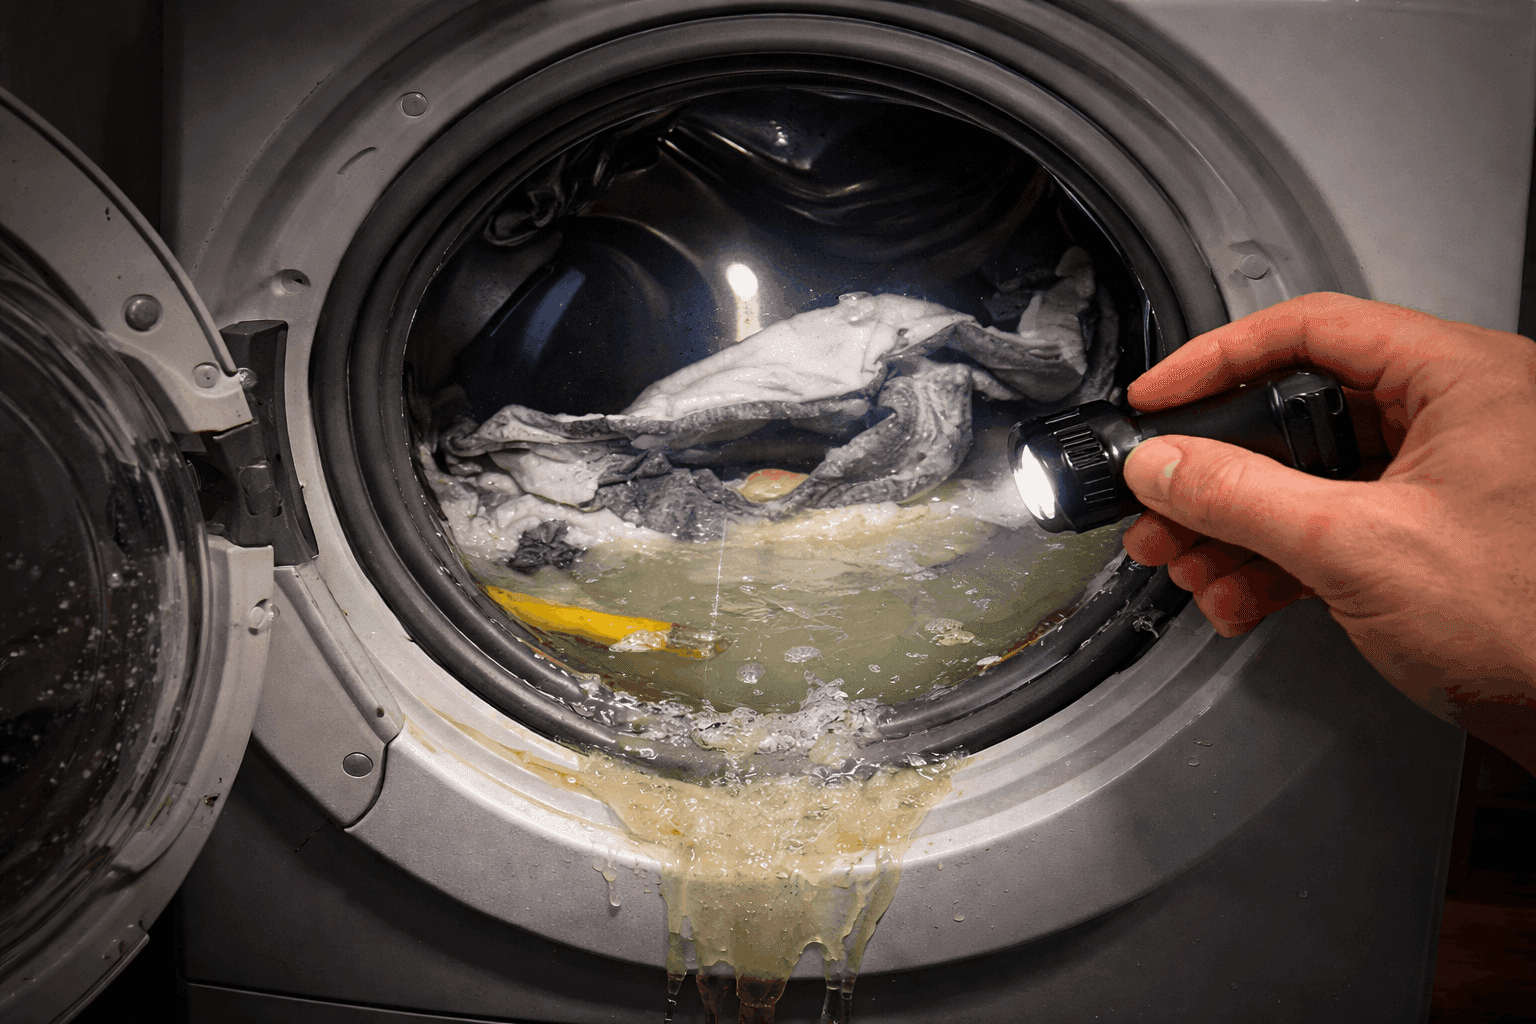
While a leaking washer is frustrating, it is a very common issue that often has a simple explanation. In many cases, you don't even need a toolkit to solve it—just a bit of detective work and some basic maintenance.
This guide will walk you through how to identify the source of the water, common reasons for those puddles, and the quick DIY fixes you can try before calling in the professionals.
🛠️ Need a washing machine diagnostic or repair? Call +18885085008 or book an expert with Fred’s Appliance Repair.
How to Diagnose Where Water is Coming From?
To diagnose the exact source of a water leak in your washing machine, you can use a combination of visual tests, timing observations, and location-based inspections.
⚠️ Safety and Immediate Action ⚠️
Before you even touch the puddle, you must ensure your environment is safe. First, unplug the washing machine from the power outlet. If the plug is wet or hard to reach safely, turn off the power at your circuit breaker instead.
Next, you need to stop the flow of water. Locate the shut-off valves on the wall behind your machine and turn them off. This prevents any more water from entering the unit while you investigate. Finally, grab some old towels and a bucket to soak up the standing water. Moisture left on the floor can lead to mold or damage to your subflooring, so getting it dry quickly is essential.
General Diagnostic Techniques
Method 1: The Paper Towel Test. Place paper towels around and under the machine to help pinpoint the exact point where water first appears.
Method 2: Running a Test Cycle. Perform a quick wash or small load test with no clothing or detergent to observe when the leaking occurs during the cycle.
Method 3: Inspecting the Exterior. Pull the machine away from the wall to get a clear view of the back and underneath, ensuring you unplug the power and turn off the water valves first for safety.
Method 4: Look for washer error codes. Some brands displays error codes when water is leaking. For example, Bosch displays E15 error code indicating water has leaked into the base pan.
Diagnosing by Location
Front of Machine: If water is coming from the front, it is most likely the door seal or gasket (on front-loaders). Inspect the seal for tears, gaps, or trapped debris. Also, check if the detergent drawer is clogged or leaking due to limescale buildup.
Back of Machine: Leaks at the back typically indicate an issue with the water supply (inlet) hoses or the drain hose. Check for loose connections, cracks, bulges, or worn-out rubber washers.
Underneath/Bottom: Pooling water directly under the machine often suggests a damaged water pump, a cracked drain pipe, or a faulty tub seal. If you see oil on the floor, it indicates a transmission problem rather than a standard water leak.
Diagnosing by Cycle Timing
Leaking while OFF: If the machine drips even when not in use, the water inlet valve is likely faulty.
Leaking during FILL or AGITATION: This often points to a damaged tub seal or a malfunctioning water level switch.
Leaking during SPIN: Leaks during this stage may be caused by an unleveled machine, a clogged water pump, or a blocked drain hose.
Leaking during DRAIN: This is frequently caused by loose hose clamps, a broken drain pump, or a hole in the drain hose.
📖 You might also like to read: Washing Machine Won’t Drain: Causes, Symptoms, and How to Fix
Other Factors to Check
Leveling: Use a level to ensure the machine is balanced; an uneven machine can cause water to overflow or leak from the door seal.
Excessive Suds: Look for soap bubbles; using too much detergent or non-HE soap can cause suds to push water out of the seals or dispenser.
📖 You might also like to read: Washing Machine Error Codes: Meaning, Causes, and Fixes (Complete Guide)
Common Reasons of Why Washer Leaking
1. Cracked Hoses and Connections
Statistically, the most common reason for a washing machine leak is a problem with the hoses. Your machine has two types: inlet hoses that bring fresh water in, and a drain hose that carries dirty water away.
The Issues: Over time, rubber hoses can become brittle, crack, or develop bulges under pressure. Sometimes, the constant vibration of the machine during the spin cycle simply causes the connections at the back to wiggle loose.
The DIY Fix: Pull the machine away from the wall to get a good look at the back. Check the hot and cold water inlet connections. If they are wet, try tightening them by hand. Avoid using heavy tools like wrenches unless absolutely necessary, as overtightening can crack the plastic fittings.
If you see a crack or a bulge in the hose itself, it needs to be replaced immediately. A good rule of thumb is to replace your rubber hoses every three to five years, even if they look fine, to prevent a sudden burst.
2. Worn/damaged Door Seal (Gasket)
If you own a front-loading machine and see water trickling down the front panel, your door seal—also known as the gasket—is likely the culprit.
The Issues: This large rubber ring is what keeps the water inside while the drum spins. However, it is a magnet for debris. Hair, lint, or even a forgotten bobby pin can get stuck in the folds, creating a tiny gap that allows water to escape. Over time, soap residue can also build up, preventing a tight seal, or the rubber itself can develop small tears.
The DIY Fix: Open the door and inspect the entire seal. Gently pull back the rubber folds to look for coins, buttons, or hair. Clean the seal thoroughly using a damp cloth and a mixture of vinegar and water or a mild bleach solution to remove mold and soap scum. If you find a visible rip or tear in the rubber, the seal will need to be replaced by a professional, as it can no longer hold pressure.
3. The Drain Pump Filter is Clogged
Many modern machines have a small access door at the bottom front. Behind this door sits the drain pump filter, designed to catch "treasures" before they reach the pump.
The Issues: If this filter becomes completely clogged with lint or small objects, water can back up and leak out from the filter housing. This is most likely to happen during the drain or spin cycles.
The DIY Fix: Place a shallow tray or a thick towel under the access door, as some water will always spill out when you open it. Unscrew the filter and clear out any debris. Rinse it under the tap and screw it back in, ensuring it is tightened correctly by hand to prevent a new leak from forming right at the filter.
4. Overload or Too Much Detergent
Sometimes, the "leak" isn't caused by a broken part at all, but rather by how the machine is being used.
The Issues:
Excessive Suds: Using too much detergent—or using regular detergent in a High-Efficiency (HE) machine—creates a "suds lock" situation. The massive amount of foam can force water out of the dispenser drawer or the overflow tubes.
Overloading: Cramming too many clothes into the drum can cause water to splash over the top of the tub or put excessive pressure on the door seal. It can also lead to an unbalanced load, which makes the machine vibrate violently, potentially loosening internal connections or causing it to "walk" across the floor.
The DIY Fix: Always follow the manufacturer's guidelines for detergent amounts. If you have a water softener, you actually need less detergent than the bottle recommends. To test if suds are your problem, run a cycle with no clothes and no soap; if no water appears, you’ve likely just been using too much detergent. Additionally, give your clothes enough room to move freely; the drum should never be tightly packed.
5. Improper Use (Detergent Overuse & Overloading)
If you notice water running down the front of the machine specifically when it first starts filling, the dispenser drawer is the place to look.
The Issues: Detergent and fabric softener can build up over time, turning into a thick, waxy residue that blocks the water jets. If the water can't flow into the drum properly, it will back up and spill out the front of the drawer.
The DIY Fix: Most drawers can be completely removed by pressing a small tab. Take it to your sink and scrub it with warm, soapy water and an old toothbrush. Don't forget to wipe out the housing where the drawer sits, as clogs can happen there too.
6. Improper Leveling (Rocking/tilting)
A washing machine that is tilted or rocking can experience unexpected leaks.
The Issues: If the machine isn't level, water may not drain correctly, or it might slosh out of the tub during the agitation phase.
The DIY Fix: Place a spirit level on top of the machine. If it's tilted, lean the machine back and adjust the leveling feet by screwing them in or out until the unit sits perfectly flat and doesn't rock when you push on the corners.
When Should You Call a Professional?
While the steps above solve a huge percentage of washer leaks, some problems are buried deep inside the machine's mechanics. You should put down the tools and call a licensed technician if:
You see oil: If the puddle on your floor is oily or brownish, it usually indicates a transmission failure, which is a complex mechanical repair.
The Leak is Internal: If you’ve checked the hoses, filters, and seals and the water is still coming from deep underneath, you may have a cracked outer tub or a faulty internal pump.
Water drips while the machine is off: This often points to a failing water inlet valve at the back of the machine, which requires internal part replacement.
Persistent Bottom Leaks: Constant puddles directly under the center of the machine often mean the tub seal has failed, requiring significant disassembly.
Need an inspection or repair for your washer?
👉 Need a washing machine diagnostic or repair? Call +18885085008 or book an expert with Fred’s Appliance Repair.
👉 Service areas: Charlotte, Raleigh, Durham, Cary, and Knoxville (North Carolina and Tennessee).

Feb 7, 2026
You open the washer and groan: the tub is still full of water, and your clothes are soaked. When a washer won’t spin or agitate, it feels like the whole day is on pause.
The good news: most causes are simple. It’s often an unbalanced load, a clogged drain, or a lid switch that won’t “click” closed. In other cases, a small part like a belt or coupler has worn out.
This guide walks you through the most common reasons and fix guide, so you can pinpoint the issue and decide what to do next.
🛠️ Need an inspection or washing machine repair? Call +18885085008 or book an expert with Fred’s Appliance Repair for same-day service in North Carolina, Tennessee, and surrounding areas.
Why Won’t a Washer Spin or Agitate? Common Causes Explained
1. Heavy or Uneven Loads
Heavy or uneven loads are the most frequent reasons a washer stops mid-cycle.
Balance the Load: If you’re washing bulky items like jeans or blankets, they can clump on one side. This triggers a sensor that stops the spin cycle to prevent the machine from “walking” or vibrating too much. Try redistributing the clothes and restarting the cycle.
Check the Power: It sounds simple, but vibrations can loosen a plug. Ensure the cord is secure and check your home’s breaker box to see if a fuse has blown.
Level the Feet: If your washer is rocking or tilted, it may stop spinning for safety. Use a level and adjust the pedestal legs until the machine is steady.
2. Faulty Lid Switch or Door Lock
For many washers, the lid switch is a vital safety feature. It tells the machine the door is closed and it is safe to spin. If this switch breaks or gets stuck, the washer will fill and drain but won't agitate or spin because it “thinks” the lid is open. Some models may fill with water and drain but will refuse to move during the wash cycle.
Troubleshooting Tip: Listen for a “click” when you close the lid. If you don’t hear it, or if the switch looks loose, it likely needs replacement.
3. Broken or Worn Drive Belt
If you hear the motor humming but the drum isn't moving, the problem is likely a broken connection between the motor and the tub.
In many washer models, a drive belt connects the motor to the agitator and drum. Over time, this belt can stretch, slip, crack, or snap entirely due to normal wear and tear. If the belt is broken, you may hear the motor humming, but the agitator will not move at all.
If you remove the back panel and find a loose or broken belt, replacing it is a relatively straightforward DIY fix.
4. Broken Motor Coupler
Direct-drive machines often use a motor coupler made of plastic and rubber to connect the motor to the transmission. It is designed to fail if the machine is overloaded to protect the motor from burning out. If it’s broken, the motor will run, but the agitator will stay still.
5. Worn Agitator Dogs
If the bottom of your agitator moves but the top does not, the problem is likely the agitator dogs. These are small plastic parts with “teeth” that allow the top of the agitator to grip and move clothes in one direction. When these teeth wear down, the machine loses its ability to agitate effectively.
6. Damaged Stator or Rotor
Modern front-load washers (and some direct-drive designs) often use a stator and rotor system instead of a belt to create a magnetic field that turns the tub. If the magnets on the rotor are cracked or the copper windings on the stator are shorted out, the machine won’t have the power to agitate or move. You might notice a burning smell, visible damage to the coils, or visible black dust if these components are failing.
7. Faulty Control Board or Timer
Additionally, the motor control board or the timer acts as the “brain” of the washer, sending power to the drive motor at the right time. If these electrical components have shorted out or burned, they may fail to signal the motor to start the agitation or spin phases. While these parts are harder to test, they are a common culprit when mechanical parts look fine.
How to Fix a Washer That Won’t Agitate (and Often Won’t Spin)
Many agitation issues can be fixed with a few basic tools and a bit of patience. Before starting any repair, always unplug the washer and turn off the water supply to ensure your safety.
Step 1: Check the Power and Balance the Load
Ensure the machine is plugged in securely and check your breaker box for any tripped fuses. If the power is fine, check to see if the load is unbalanced or too heavy. Redistributing bulky items like towels or blankets can often trigger the machine to resume its normal cycle.
Step 2: Clear the Drain Hose and Pump
Check the drain hose for any kinks or clogs that might be preventing water from leaving the tub. If the hose is clear, you may need to access the water pump to check for trapped debris or small clothing items. Removing a simple blockage like a sock can often restore the motor's ability to turn.
Step 3: Test and Replace the Lid Switch
Listen for a distinct “click” when you close the washer lid. If you don't hear it, or if the switch looks loose, you can test it for continuity using a multimeter. A faulty switch is usually easy to replace by removing the top or front panel of the machine.
Step 4: Inspect and Swap the Drive Belt or Motor Coupler
For belt-driven models, remove the back panel to see if the drive belt is loose or broken. If your machine is direct-drive and you suspect the coupler, you will need to remove the motor to access the small plastic piece. Both parts are relatively inexpensive and can be swapped out with standard household tools.
Step 5: Replace Worn Agitator Dogs
To fix the agitator, remove the cap or fabric softener dispenser from the top of the center post. You will likely need a socket or wrench to remove the bolt holding the agitator assembly in place. Once the assembly is out, you can easily slide in new agitator dogs to restore the gripping power of the machine.
When to Call a Professional?
While many repairs are DIY-friendly, some issues require a specialist's touch. You should call a professional technician if you notice a burning smell, see sparks, or hear loud grinding noises coming from the machine. These signs often point to a failing drive motor or internal damage within the transmission and gearbox, which are complex to repair.
Additionally, if your washer is displaying error codes that you cannot resolve or if you are uncomfortable using a multimeter to test electrical components like the control board, professional help is the safest option. Experts have the specialized tools and experience to diagnose root causes quickly, helping you avoid accidental damage during the repair process.
Need an inspection or repair for your washer?
👉 Need a washing machine diagnostic or repair? Call +18885085008 or book an expert with Fred’s Appliance Repair.
👉 Service areas: Charlotte, Raleigh, Durham, Cary, and Knoxville (North Carolina and Tennessee).
Jan 31, 2026
A washing machine drains by pumping used water out of the drum, through a drain hose, and into your home’s plumbing.
If anything in that path is blocked—or if the pump or a safety sensor fails—water may stay in the tub after the cycle ends. This can happen in both top-load and front-load washers. Most of the time, the cause is simple: a clogged filter, a kinked hose, or a small blockage.
In fact, you can solve about 90% of these problems with a little DIY know-how.
This guide explains what’s the cause of the washer won’t drain and how to get your washer draining again.
What are the Signs of a Washer Drainage Problem?
Sometimes the signs are obvious, like water sitting in the drum after the cycle ends. But other symptoms are more subtle. You might notice:
Sopping wet clothes: The machine finishes, but your garments are still heavy with water.
Strange noises: You may hear gurgling sounds or a loud humming during the drain phase.
Mid-cycle stops: The washer simply stops working before it gets to the spin cycle.
Error codes: Modern machines will show you errors with letters and numbers like "OE," "5E," or "F21" to tell you something is wrong.
Bad smells: If water sits too long, you might notice a musty odor in your washer (or even a burning smell if the pump is straining).
Washer Machine Errors That Signal Drainage Issues
Washing machines use error codes to tell you where it hurts. While every brand is different, here are the common ones for drainage:
Samsung: Look for "5E" or "5C".
LG: You will see "OE".
Whirlpool: Usually flashes "F21" or "F02".
Bosch: Uses "E18" or "F18".
Miele: Displays "F11".
If you see these error codes in your washer, you can start by fixing the drainage issue by yourself by following the below steps:
The Most Common Causes of Washing Machine Drainage Failure
Understanding the "why" is the first step to the "how." Here are the main causes of washing machine won’t drain:
1. The Clogged Pump Filter
This is the number one cause of drainage issues, responsible for roughly 60% of cases. The filter is there to catch small items like coins, buttons, hairpins, and lint before they reach the pump. Over time, these items build up and block the flow of water.
2. Blocked or Kinked Drain Hose
The drain hose is the pipe that carries dirty water out of the machine. If it is bent, twisted, or crushed against the wall, the water cannot escape. Sometimes, small items like socks or heavy lint buildup can also clog the inside of the hose.
3. "Suds Lock" from Too Much Soap
Using too much detergent, or the wrong kind, is a common mistake. High-efficiency (HE) machines need very little soap. If you use too much, it creates an overflow of bubbly suds that can get into the pipes and stop the pump from working properly.
4. Unbalanced Loads
If you wash a single heavy item, like a rug or a large blanket, it can clump to one side of the drum. When the machine detects this imbalance, it may lower the spin speed or stop entirely to prevent damage. This leaves your clothes soaking wet.
5. Mechanical and Electrical Faults
If the filters and hoses are clear, the issue might be internal hardware. This includes a broken drain pump, a loose drive belt, or a faulty lid switch. On top-loaders, if the machine thinks the lid is open, it will refuse to drain or spin.
How to Fix Washer Won’t Drain Issue Yourself?
Step 1: Get the Water Out
⚠️ Do this first: Unplug the washer and turn off the water supply.
There are three manual methods you can use to get the water out of your washer:
Option 1: Use the Emergency Drain Hose (Best Method)
Open the small access panel at the bottom front of the washer.
Find the small emergency drain hose.
Place a shallow tray/bowl under the hose.
Pull the hose out carefully and remove the cap/plug.
Drain slowly into the tray, emptying as needed until the flow stops.
Replace the cap, return the hose, and close the panel.
Option 2: Drain by Gravity Using the Main Drain Hose
Find the large corrugated drain hose (usually at the back).
Pull the hose out of the standpipe/laundry drain.
Lower the end into a bucket on the floor.
Let gravity drain the water. Empty the bucket as needed.
Put the hose back into the standpipe when finished.
Option 3: Scoop Water Out of the Drum (Last Resort)
If you can, tilt the washer slightly back so water stays away from the door.
Open the door carefully.
Scoop water out using a jug/ladle/cup into a bucket or sink.
Repeat until the drum is empty enough to continue troubleshooting.
Once the washer is empty, follow these steps in order. Most drain issues are caused by a clogged filter, a kinked hose, or a blocked standpipe.
Step 2: Check and Clean the Drain Filter
Locate the filter door at the bottom front of the washer.
Put down a towel and a shallow pan to catch spills.
Slowly unscrew the filter counterclockwise (lefty-loosey).
Remove debris (coins, nails, hair, etc.).
Check the impeller (small fan blades) inside the housing—make sure it spins freely and isn’t jammed.
Step 3: Inspect the Drain Hose (Kinks, Clogs, and Height)
Pull the washer away from the wall.
Straighten any kinks or sharp bends. Replace the hose if it’s crushed.
If you suspect a clog, disconnect the hose and flush it (outside with a garden hose works well).
Verify hose height: the top of the hose should be 60–100 cm from the floor.
Too low: water can siphon back into the washer.
Too high: the pump may struggle to push water out.
Step 4: Check the Household Drain / Standpipe
Sometimes the washer is fine—the plumbing is blocked.
If the washer drains into a sink connection, check the spigot for grease/food buildup.
Check the standpipe: if it’s backed up, the washer can’t empty into it.
Try a plumbing snake. (Baking soda + vinegar may help minor odor/buildup, but it won’t clear a solid clog.)
Advanced DIY: Going Under the Machine
If you have checked the filter and the hose but the machine still won't drain, you may need to look at the sump hose or the pump itself. This is for more experienced DIYers.
Ensure the machine is unplugged and fully drained.
Tip the machine: Carefully lean the washer onto its side or back (you may need a friend to help).
Check the sump hose: This is the thick hose that goes from the bottom of the drum to the pump. Use vice grips to undo the clips and check for trapped items like socks or heavy debris.
Inspect the pump: Look for physical damage like cracks. Sometimes a single small nail can get stuck in the pump and stop it from spinning. If the motor runs but nothing happens, or if the pump makes a loud grinding noise, it may be burnt out and need replacement.
What To Do If It Still Won’t Drain?
Listen for the pump: if you hear humming but no draining, the pump may be jammed or failing.
If the washer trips the breaker or smells hot: stop and call a technician.
How to Prevent Future Clogs?
Maintenance is much cheaper than repair. Follow these simple tips to keep your machine running smoothly:
Empty your pockets: This is the most important rule. Check for coins, tissues, and hairpins every single time.
Use the right detergent: Use High-Efficiency (HE) soap and follow the dose on the bottle. Most loads only need one or two tablespoons.
📖 Read more about: Everything You Need to Know About Washer DetergentsClean the filter regularly: Do not wait for a problem. Clean your pump filter every 3 to 4 months.
Monthly cleaning cycle: Run a hot water cycle with no clothes once a month. You can add white vinegar to help break down soap buildup.
Don't overload: Sticking to the recommended load size protects the motor and the drive belt from extra strain.
When Should You Call a Professional?
While you can fix many things yourself, some situations require an expert technician. You should call for help if:
Persistent errors: The error code keeps coming back after you have cleaned everything.
Electrical issues: You see sparks, smell burning, or the machine keeps tripping your circuit breaker.
Water leaks: You notice significant leaks from the internal tub or main valves.
Unusual noises: Loud grinding or clicking sounds often mean the motor or pump hardware has failed.
Need an inspection or repair for your washer?
👉 Need a washing machine diagnostic or repair? Call +18885085008 or book an expert with Fred’s Appliance Repair.
👉 Service areas: Charlotte, Raleigh, Durham, Cary, and Knoxville (North Carolina and Tennessee).
Jan 30, 2026
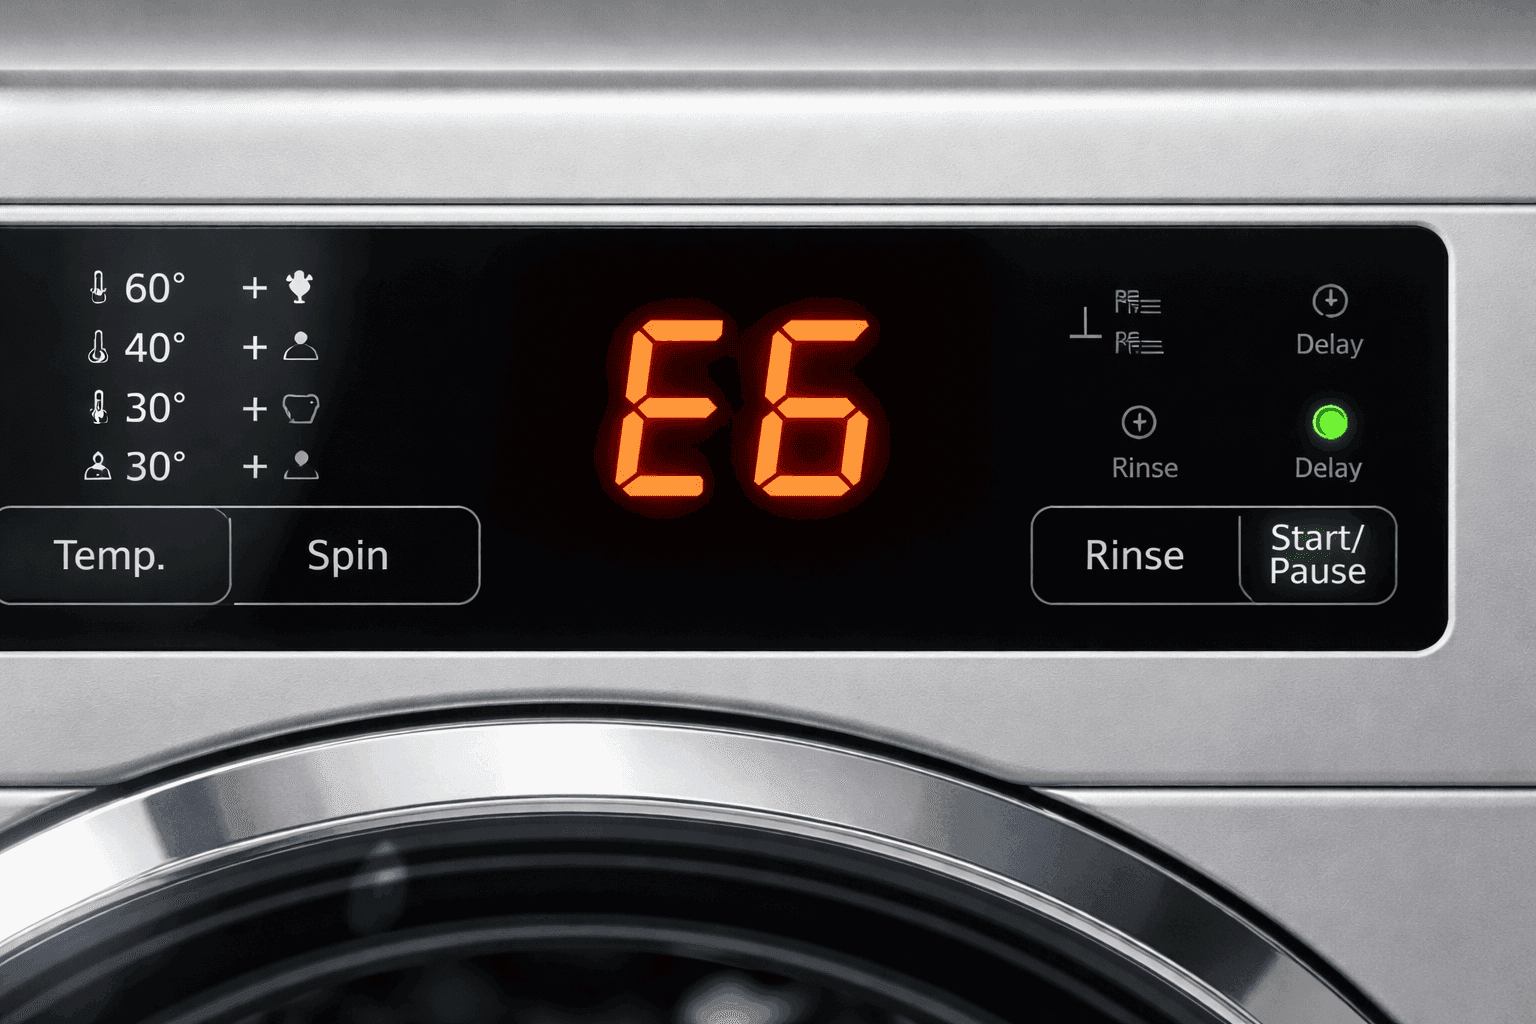
Your washing machine suddenly stops and starts flashing a strange code like "F21" or "OE."
Why?
Or, what are those codes?
These codes are your machine’s way of telling you exactly what is wrong.
Most washer error codes are just warnings, and you can fix these problems yourself, like the door being locked, an unbalanced load, or low water pressure.
This guide will help you understand those cryptic signals and get your laundry day back on track—or know when to call for a repair based on the error codes.
What Are Error Codes in Washers?
Error codes are alphanumeric messages that appear on your washing machine's digital display. On older models, these might show up as a specific pattern of blinking lights or symbols. Each code acts as a diagnostic tool triggered by internal sensors when the machine detects an anomaly during a cycle.
These systems are designed to protect your washer appliance from further damage by stopping the operation when a problem occurs.
All Washer Error Codes and Their Meanings, and Fixes
Error Code | Common Meaning | Possible Cause | Quick Fix |
|---|---|---|---|
E1 / F1 / IE / 4C | Water fill timeout | Closed tap, clogged inlet filter, or kinked hose | Open the water tap fully, clean the filter screen, or straighten hoses |
E2 / F2 / 5C / OE / 5E | Drainage error | Clogged pump filter, blocked drain hose, or improper hose height | Clear debris from the drain filter and ensure the hose is not kinked |
E3 / UE / UB / dc | Unbalanced load | Laundry is unevenly distributed or machine is not level | Redistribute clothes evenly and adjust the leveling feet |
E4 / dE / LE / dL | Door/Lock error | Door is not closed properly or latch is obstructed/faulty | Close the door firmly and check for trapped clothing or obstructions |
E5 / HE / 5E | Heating error | Faulty heating element or malfunctioning thermostat | Test heating element continuity and check thermostat connections |
Sud / Sd | Excessive suds | Using too much detergent or the wrong type (non-HE) | Run a rinse cycle to clear foam and reduce detergent amount in the future |
OC | Overcurrent error | Power surge, voltage spike, or motor malfunction | Unplug the machine for 5–10 minutes to reset; check electrical connections |
SE / tE | Sensor error | Faulty temperature or pressure sensor; loose wiring | Clean sensor debris, secure connections, or replace faulty sensors |
CL | Child lock activated | Feature was accidentally turned on | Hold the specific child lock button (usually for 3 seconds) to deactivate |
E6 / F6 | Motor/drive error | Overloading or faulty drive belt/motor connections | Reduce load size, check the belt, or call a professional for diagnosis |
E7 / F7 | Control board malfunction | Electronic glitch or faulty main circuit board | Power cycle the machine by unplugging it; may require board replacement |
E8 / F8 / FE / OF | Overflow/water level | Malfunctioning pressure sensor or faulty inlet valve | Check the water level sensor and inspect for blockages causing slow drainage |
PE | Pressure sensor fault | Water level sensor failure or blocked pressure hose | Check water supply pressure and inspect/clean inlet valves and filters |
F01 | Control board failure | Main control board glitch or electrical wiring issue | Unplug the washer for several minutes to attempt a system reset |
F21 | Long drain time | Obstruction in drain pump filter or drain hose | Clear clogs from the drain hose and clean the pump filter |
3C | Motor defect | Malfunction in the motor or inverter | Requires a technician to inspect the motor and internal wiring |
LE | Motor overload | Excessive laundry load causing mechanical strain | Reduce the amount of laundry in the drum and restart the cycle |
Common Error Code Categories in Washers
Washing machine malfunctions generally fall into a few main categories regardless of the brand you own. Understanding these categories can help you narrow down where the problem lies.
Drainage and Pump Issues
Drainage errors are some of the most frequent problems homeowners face. They are often represented by codes like E2, F21, 5E, or OE. These codes mean the machine is taking too long to drain or cannot remove water at all. The primary cause is usually a blockage in the drain pump filter caused by lint, coins, or small items like socks. You should also check the drain hose for any kinks or verify it is installed at the correct height.
Water Supply and Inlet Problems
If your machine is not filling with water or filling too slowly, you will see codes like E1, 4E, IE, or FH. This often happens because the water supply valves are not fully open. Another common cause is a clogged inlet filter screen, which can be cleaned with a small brush. In some cases, low house water pressure or a kinked intake hose prevents the machine from detecting water.
Unbalanced Loads and Drum Movement
Codes such as E3, UE, UB, or dc signal that the drum is not balanced. This happens when heavy items like blankets or rugs clump together on one side during the spin cycle. When this occurs, the machine may stop or shake excessively to prevent damage. To fix this, simply pause the cycle and manually redistribute the laundry inside the drum.
Door Lock and Safety Failures
Safety is a priority for modern washers, so they will not start if they think the door is open. Codes like dL, dE, dL, or F01 point to door lock issues. Sometimes the fix is as simple as removing a piece of clothing caught in the seal. Other times, the mechanical latch or the electronic sensor might be faulty and require a replacement.
Heating and Temperature Errors
Temperature-related codes like HE, E5, or F03 indicate that the water is not reaching the right temperature. This is very common in front-loading machines that heat their own water. A faulty heating element or a malfunctioning thermostat is usually the culprit. You can test the heating element for continuity with a multimeter if you feel comfortable doing so.
Motor and Electrical Malfunctions
Electrical issues are signaled by codes like OC, CE, or F01. These can be caused by power surges or malfunctions in the main control board. A simple reset—unplugging the machine for 5 to 10 minutes—can sometimes clear temporary electronic glitches. If the motor itself is overloaded or jammed, you might see an LE code, suggesting you should reduce the load size.
Excessive Suds
If you see Sud or Sd, it means there is too much foam in the drum. This is almost always caused by using too much detergent or the wrong type of soap. High-efficiency (HE) machines are particularly sensitive to detergent amounts. When this happens, the machine may run a special rinse cycle to clear the foam, and you should use less soap in the future.
Brand-Specific Washing Machine Error Code Examples
While many codes are similar, different manufacturers use their own unique languages.
Samsung: They often use 4C for water supply, DC for unbalanced loads, and UB for spinning issues. They also use 5E specifically for drainage problems.
LG: You will frequently see IE for inlet errors and OE for drainage errors. CL is a very common non-fault code for the child lock.
Whirlpool: Their codes usually start with "F" and "E," such as F02 for drain issues or F06 for motor faults. F01 typically signals a main control board failure.
Bosch: They use codes like E15 to indicate a water leak has been detected in the base of the machine. E18 or F18 is their standard code for a drain pump timeout.
Beko: These machines often show EHO for a door open error or EFO for a water filling error.
Miele: You might see F11 for drainage difficulties or F16 if the machine detects too much detergent.
Preventive Measures to Avoid Errors
Most error codes can be prevented with a little bit of regular care. Following these simple steps will help your machine run smoothly and last longer:
Use the right detergent: Always use High-Efficiency (HE) detergent if your machine requires it, and never exceed the recommended amount.
Clean the filters: Check and clean the drain pump filter and the water inlet screens at least once a month to prevent clogs.
Balance your loads: Avoid washing a single heavy item alone; add a few towels to help balance the drum during the spin cycle.
Inspect the hoses: Regularly check the hoses at the back of the machine for any signs of wear, leaks, or sharp bends.
Don't overload: Stick to the load capacity recommended in your manual to avoid straining the motor and belt.
When to Call a Professional?
While over 50% of error codes can be resolved with basic DIY troubleshooting, some situations require an expert. You should call a professional technician if:
Errors are persistent: If a code keeps coming back after you have tried the recommended fixes, there may be a deeper electrical problem.
Internal hardware fails: Problems involving the motor, the main control board, or internal wiring are complex and can be dangerous to fix without training.
Water leaks: Serious leaks from the internal tub or major valves can cause water damage to your home if not handled correctly.
Under warranty: If your machine is still under warranty, you should contact the manufacturer's service center first to avoid voiding your coverage.
Need an inspection or repair for your washer?
👉 Need a washing machine diagnostic or repair? Call +18885085008 or book an expert with Fred’s Appliance Repair.
👉 Service areas: Charlotte, Raleigh, Durham, Cary, and Knoxville (North Carolina and Tennessee).
Jan 24, 2026
We all want our laundry to come out smelling fresh and looking spotless. It is natural to think that if your clothes are extra dirty, adding a little more soap will do a better job.
However, the truth might surprise you. Using too much detergent, or using the wrong kind, can lead to expensive repairs and ruined wardrobes.
Can Laundry Detergent Damage a Washing Machine?
Yes, laundry detergent can absolutely damage your washing machine if it is not used correctly. When you use too much detergent, it creates an overflow of suds. These bubbly suds can get into pipes and hoses, leading to clogs that prevent the machine from draining properly.
One of the most serious issues involves a part called the "drum spider" or aluminum support. Excess suds can reach this support and cause it to rust. Because the spider stabilizes the drum, a rusty or damaged one forces the motor to work much harder to compensate, which can lead to a total motor failure over time.
Additionally, detergent residue traps moisture, creating a breeding ground for mold and mildew in the outer drum and rubber gaskets, which is why many machines develop a foul, musty smell.
Can Too Much Detergent Ruin Clothes?
Ironically, using extra detergent often makes your clothes dirtier. Too many suds create a slippery layer on the fabric that prevents the friction needed to rub off stains. Instead of being washed away, dirt and bacteria get trapped in the excess soap and settle back into the fibers.
Over time, this build-up can ruin your favorite outfits in several ways:
Stiff fabrics: Clothes may feel hard, stiff, or "greasy" to the touch.
Discoloration: You might notice white spots, streaks, or a dingy, faded appearance caused by a film of residue.
Skin irritation: Detergent trapped in the fibers can cause rashes, itchiness, or allergic reactions like contact dermatitis.
Odors: Odor-causing bacteria can linger in the soap film, especially on synthetic exercise gear, making clothes smell musky even after they are "clean".
👉 Front-Loading Washing Machine Stinks? Here Are the Reasons and How to Clear Up the Smell
Can You Put Detergent in the Washing Machine?
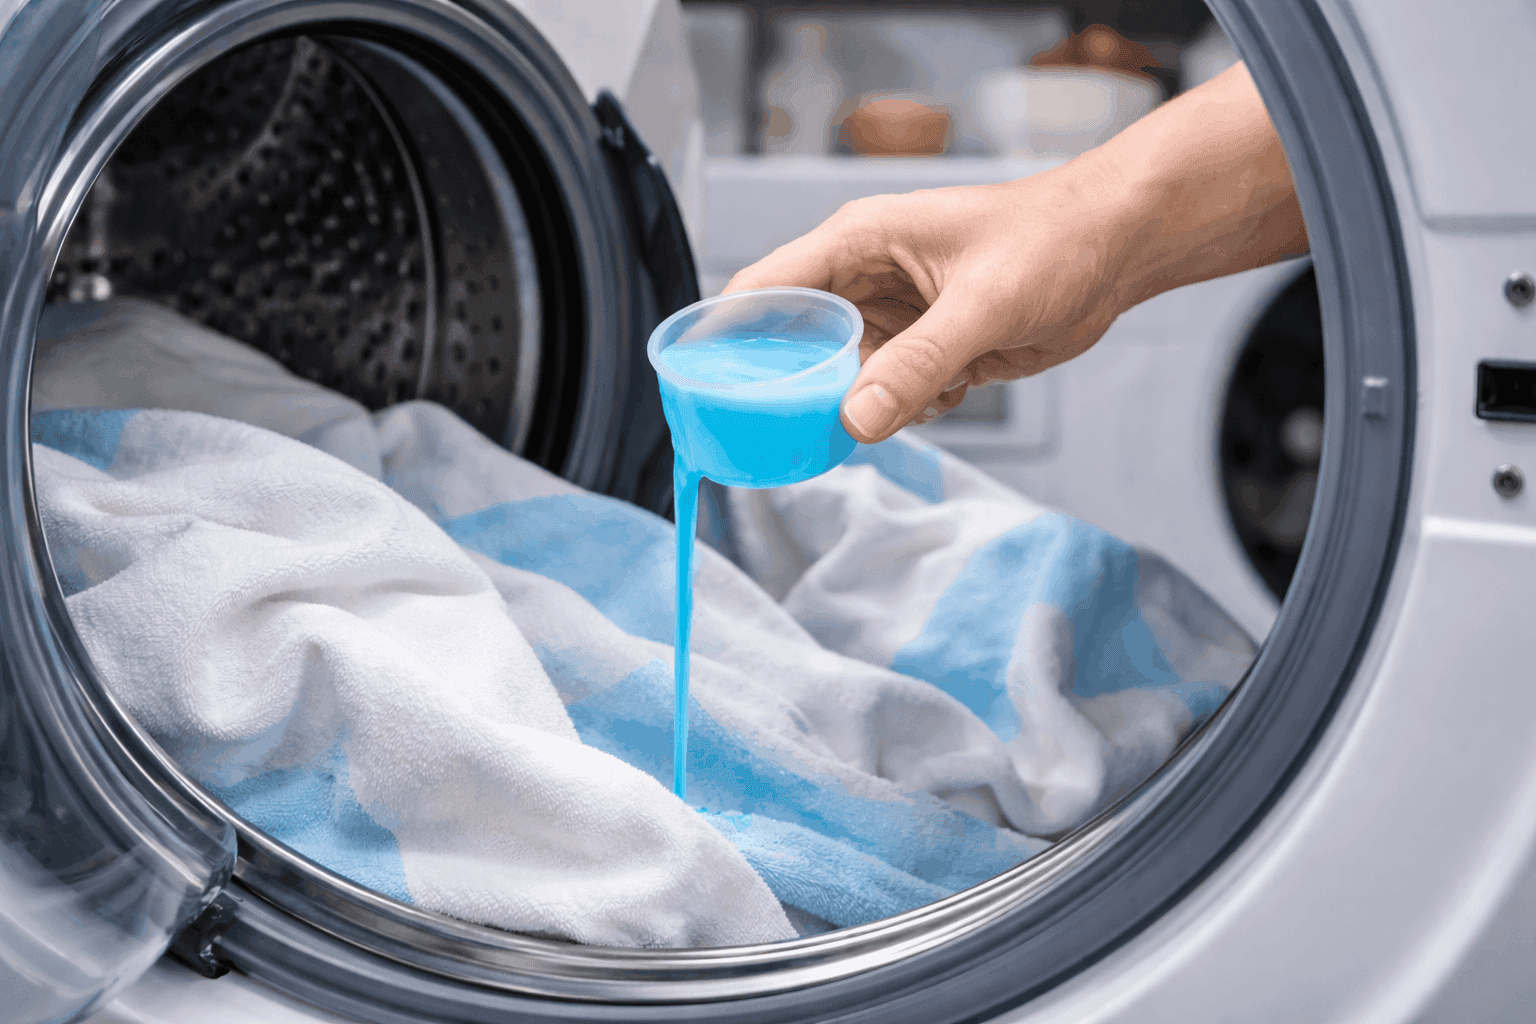
It is perfectly okay—and necessary—to put detergent in your washing machine, but how you do it matters. Most modern machines, especially front-loaders and high-efficiency (HE) models, are designed to work with very small amounts of concentrated soap. For a standard load, you may only need one to two tablespoons of detergent.
The best practice is to use the detergent dispenser tray. The machine is programmed to flush this tray with water at the right time, mixing the soap thoroughly before it hits your clothes. If you prefer to put detergent directly into the drum, it is best to add it before the laundry. This ensures it mixes with the water immediately and prevents the concentrated dyes in some soaps from staining your clothes.
By measuring your soap carefully and choosing the right type—such as HE detergent for HE machines—you can keep your appliance running smoothly for years while ensuring your clothes stay soft and bright.
Powder vs Liquid Detergent: Which One Should You Use?
Choosing between powder and liquid detergent depends on your washer, water temperature, and stain type.
Pick by machine
Front-load/HE washers: Use HE detergent (powder or liquid) to avoid extra suds and residue.
Top-load washers: Either type works; HE is still a good choice for newer models.
When liquid is better
Dissolves well in cold or hot water
Great for pre-treating stains
Less likely to leave residue on dark clothes
Easier to over-pour, so measure carefully
When powder is better
Strong for mud and heavy dirt
Can work well in hard water (often with a booster)
May leave white flakes in cold washes and can clump if the drawer is damp
Bottom line: Use the right dose. Too much of either can cause buildup, rinsing issues, and odors.
Does Liquid Detergent Damage Washing Machines?
Liquid detergent won’t damage your washing machine by itself. But using too much of it, or using the wrong kind like non-HE detergent in an HE washer can cause problems. Extra soap can leave buildup, create mold and bad odors, and clog the drain. Over time, this can strain the pump and motor and lead to costly damage.
What Can Ruin a Washing Machine?
While detergent is a major factor, several other habits can ruin your appliance. Overloading the machine is one of the most common mistakes; it puts extreme stress on the motor and prevents clothes from moving freely.
Neglecting regular maintenance can also lead to a breakdown. For example, washing machine hoses should be inspected monthly for cracks or water leaks and replaced every three to five years to prevent water damage. Clogged lint filters and drainage holes in the door gasket can also cause the machine to malfunction or leak. Even failing to leave the door open between cycles can ruin the machine’s freshness by encouraging mold growth.
How to Tell If Your Machine Has Detergent Buildup?
Detergent buildup often shows up first as sticky residue or a musty smell in the dispenser, drum, or rubber door seal. You may also notice too many suds during the wash or soap bubbles left on the door after the cycle ends. On laundry, buildup can leave clothes stiff, scratchy, spotty, or still smelly even after washing. If buildup gets worse, the washer may run longer, make odd noises, or leak because it can’t rinse properly.
Need an inspection or repair for your washer?
If your clothes still smell, you see residue in the drum or dispenser, or your washer is leaking or running longer than normal, the problem may be more than too much detergent. It could be buildup in the drain system, a clogged filter, a worn door seal, or a pump issue. To prevent mold, poor cleaning, and costly damage, it’s best to have a pro take a look.
👉 Need a washing machine diagnostic or repair? Call +18885085008 or book an expert with Fred’s Appliance Repair.
👉Service areas: Charlotte, Raleigh, Durham, Cary, and Knoxville (North Carolina and Tennessee).

Jan 18, 2026
Your refrigerator is likely the most hardworking appliance in your home, running 24 hours a day, 365 days a year to keep your food safe and fresh. While it usually sits quietly in the corner, a breakdown can turn your life upside down in just a few hours, leading to spoiled milk, ruined produce, and a very expensive mess.
Because modern refrigerators are complex machines with delicate sensors and intricate cooling systems, they require a little bit of regular maintenance to stay at peak performance.
By spending just a few minutes every month on basic refrigerator maintenance, you can save money on energy bills, extend the lifespan of your appliance, and avoid the stress of sudden breakdowns.
Here is a comprehensive guide on how to treat your refrigerator like the kitchen hero it is.
Tips to Take Care of Your Refrigerator
1. Set the Right Refrigerator Temperature
Start with temperature settings, because they affect both food safety and energy efficiency. Keep your refrigerator at 4°C (37°F–40°F) and your freezer at -18°C (0°F). If the temperature is too low, your fridge wastes electricity. If it’s too high, bacteria can grow and food spoils faster.
If your fridge has a basic dial and you’re unsure whether it’s accurate, a small refrigerator thermometer can help you confirm the real temperature.
2. Keep Airflow Clear Inside the Fridge
Cold air must move freely to cool every shelf evenly. When vents are blocked, your refrigerator has to work harder to maintain the same temperature, which can lead to uneven cooling and higher energy bills.
Avoid pushing large items directly against the back wall or in front of airflow vents. Even simple changes—like leaving a little space between containers—can improve circulation and prevent warm spots.
3. Leave Space Behind the Refrigerator
Your refrigerator releases heat as it runs, and it needs room to “breathe.” If it’s pressed tightly against the wall, heat can build up and stress the cooling system.
Leave at least 2–3 cm (about 1 inch) between the back of the refrigerator and the wall. Keeping this area clear helps the appliance release heat efficiently and reduces the risk of overheating.
📖 You might also like to read: Common Mistakes with New Appliances: A Guide for Homeowners
4. Keep the Refrigerator Level So the Door Seals Properly
A fridge that leans slightly can cause the door to close poorly, which lets cold air leak out. Even a small gap can increase power usage and cause temperature problems.
You can check the level by placing a simple level tool on a shelf inside the fridge. If needed, adjust the feet at the bottom until the refrigerator sits evenly. A level fridge usually runs quieter too, because the door closes more naturally.
5. Clean and Protect the Door Seal (Gasket)
The door gasket is the rubber seal around the door. It keeps cold air in and warm air out, which makes it a key part of proper fridge maintenance. When the gasket is dirty, cracked, or loose, your refrigerator may run longer than it should, and your electricity bill may climb.
A quick way to test the seal is the coin test. Close the refrigerator door on a coin and gently pull. If the coin slides out easily, the gasket may not be sealing well. To keep the seal working properly, wipe it weekly using warm water and mild soap, then dry it. This prevents sticky buildup and helps the rubber stay flexible.
Also, try not to leave the door open while deciding what to eat. Every extra second lets cold air escape and forces the appliance to work harder to cool down again.
6. Clean the Condenser Coils Twice a Year
If you want one “high impact” task for refrigerator care, this is it. Condenser coils release heat during cooling, and when they get covered in dust or pet hair, your fridge loses efficiency. That makes the compressor work harder, which can shorten the appliance’s lifespan.
Most coils are located on the back or bottom of the refrigerator. Unplug the unit, then use a vacuum or coil brush to remove the buildup. Doing this twice a year is a simple way to improve performance and reduce energy use.
7. Defrost the Freezer When Ice Builds Up
If your freezer is not frost-free, ice buildup can block airflow and reduce cooling power. When the frost reaches around 7 mm (¼ inch), it’s time to defrost your freezer.
Turn off the freezer, move food into a cooler, and let the ice melt naturally. Never use sharp metal tools to scrape ice because you can damage the interior walls or puncture something important. A plastic scraper or a wooden spoon is much safer.
8. Store Food in a Way That Helps Your Fridge Work Better
Smart food storage supports better airflow and reduces moisture inside the fridge. This improves cooling consistency and helps prevent smells from spreading.
Try to keep leftovers in sealed containers, and cover foods that release strong odors. This reduces humidity and keeps the refrigerator interior cleaner, which helps your appliance maintain stable temperature more easily.
9. Protect Your Refrigerator from Power Surges
Modern refrigerators rely on electronic control boards, and sudden voltage spikes can cause expensive damage. A good surge protector designed for appliances can prevent unexpected failures and protect your investment.
This is especially helpful in areas with unstable power or frequent outages.
10. Follow the 24-Hour Rule After Moving a Refrigerator
If you just transported a refrigerator, don’t plug it in immediately. During movement, the compressor oil can shift away from where it needs to be. Let the unit stand upright for 24 hours before turning it on, so everything settles correctly.
This one step can prevent long-term compressor issues.
11. Register Your Warranty for Faster Support
Warranty registration takes only a few minutes, but it can save you stress later. Register your fridge online and keep your model and serial number stored somewhere easy to find. If there’s ever a recall or major repair issue, you’ll be ready, and support is usually faster.
When to Call a Professional for a Refrigerator?
While you can safely handle cleaning and filter replacements, some issues are dangerous to tackle alone. You should call a certified technician for refrigerator inspection or repair if you notice:
Electrical issues: Visible sparks, a burning smell, or frequently tripped breakers.
Unusual noises: Loud grinding, vibrating, or clicking sounds.
Leaks: Standing water or refrigerant leaks near the unit.
Cooling failure: If the compressor won't start or the temperature remains inconsistent despite cleaning the coils.
Hiring a professional ensures an accurate diagnosis, protects your manufacturer's warranty, and—most importantly—keeps you safe from high-voltage electricity and pressurized gases
Need an inspection or repair for your refrigerator?
If your fridge isn’t cooling properly, is leaking water, or keeps making loud noises, the issue may be more than a simple setting or dirty coil. It could be a failing compressor, a faulty thermostat, a clogged drain line, or a bad door seal. To avoid spoiled food and bigger repair costs, it’s best to have a pro check it.
👉 Need a refrigerator diagnostic or repair? Call +18885085008 or book an expert with Fred’s Appliance Repair.
👉 Service areas: Charlotte, Raleigh, Durham, Cary, and Knoxville (North Carolina and Tennessee).
Jul 12, 2025
Many homeowners accidentally shorten the lifespan of their new investment by skipping key steps during setup and early use.
A new appliance is a major financial commitment. To help you get the most out of your purchase and ensure your appliances last for years, you should not wait for a problem to occur.
This comprehensive guide covers the most frequent mistakes made by homeowners and provides the exact actions you should take to avoid them.
5 Appliance Mistakes to Avoid So Your New Appliances Last Longer
1. Skipping the Manufacturer’s Manual
Modern appliances are complex machines with advanced sensors and specific installation needs. Many homeowners assume they already know how to use a new appliance and toss the manual aside. This can cause safety problems or cancel your warranty.
Before first use, scan the manual for any setup steps that must be done in order, including removal of packaging or shipping parts, correct connection requirements, and any recommended “first run” or calibration steps. Keep the manual in an easy-to-find place so you can quickly check error codes, settings, and care instructions later instead of guessing or relying on random online advice.
🛠️ Need a home appliance diagnostic and inspection? Call +18885085008 or book an expert with Fred’s Appliance Repair.
2. Poor Installation and Leveling
When appliances are not installed properly, they can shake, leak water, make noise, and wear out sooner than expected.
Before you use the appliance, make sure it sits steady and level. Use a simple bubble level and make small tweaks if needed. This can cut down on shaking and wear over time.
Next, check every hookup and connection. Make sure each one is tight and secure. Look for hoses or cords that are kinked, pinched, or pulled too tight.
If the install involves gas, high voltage, or plumbing, hire a certified professional. It helps prevent leaks, damage, and other safety problems.
3. Overloading and Misusing the Appliance
Just because an appliance looks roomy doesn’t mean you should fill it to the max. Overloading, or using it the wrong way, can block normal operation and put extra strain on internal parts.
Stick to the capacity and use limits from the manufacturer, even if it seems like it can handle more. Load items so they have space to move, and so air or water can flow as needed. Use the recommended products and settings, and don’t use more than required. Too much product can cause buildup and lower performance over time.
4. Skipping Regular Maintenance from Day One
Many homeowners think a new appliance needs no care. But dust, residue, and debris can build up right away. Without upkeep, odors or performance issues can show up within weeks.
Start basic maintenance early, not after a problem starts. Keep a simple cleaning routine on a set schedule, with extra attention on spots that hold moisture or grime. Wipe seals and contact points to stop buildup. Check filters, traps, and vents often so air flow and drainage stay clear. Small monthly habits can help prevent smells, clogs, and early wear.
5. Forgetting Warranty Registration
With a busy schedule, it’s easy to forget warranty registration. But if you skip it, you may face delays or lose coverage when you need a repair.
Register the appliance as soon as it’s installed so the purchase is linked to your name and contact details. Keep the model and serial number, proof of purchase, and warranty info together in one spot. That way, you can find everything fast if you need service.
If you’re thinking about an extended plan, read what it really covers. Then decide based on likely repair costs, the appliance’s complexity, and how often you use it.
Common Home Appliance Issues and How to Solve Them
If your new appliance is not working as expected, try these steps before calling for service:
Problem | Potential Solution |
|---|---|
Unpleasant Odors | Allow airflow after use and clean internal surfaces regularly |
Poor Performance | Ensure nothing is blocking moving parts or airflow paths. |
Excess Moisture or Frost | Check door seals and make sure they close tightly. |
Appliance Won’t Start | Check the circuit breaker and confirm it is on a dedicated circuit if required. |
📖 Resources:
Final Tips
Preventive care is always cheaper than repair. Simple habits can add years to your appliance’s life.
By avoiding these common mistakes and staying proactive with maintenance, you can protect your investment and enjoy reliable performance from your appliances for years to come.
👉 Need a home appliance diagnostic and inspection? Call +18885085008 or book an expert with Fred’s Appliance Repair.
👉 Service areas: Charlotte, Raleigh, Durham, Cary, and Knoxville (North Carolina and Tennessee).

Jun 7, 2025
When an appliance stops working, it’s frustrating. Your fridge is warm. The washer won’t spin. The oven won’t heat.
And the first thought is usually: “Can I fix this myself and save money?”
Sometimes, yes. A few problems are simple and safe. But many modern appliances are not like the old ones.
Today’s machines use control boards, sensors, and safety systems. And, a small mistake can turn into a bigger (and more expensive) repair.
This guide will help you decide what to do next — without stress.
Why Hiring a Professional Appliance Repair Technician Is Often the Better Choice
Let’s keep it simple: a professional repair isn’t just about comfort or budget.
It’s usually the safer and smarter choice.
1. It's Safer Option
Some repairs can be dangerous.
Appliances may involve:
High voltage electricity
Gas lines
Heat and pressure
Sharp metal parts
Water + electricity (a risky mix)
One wrong move can lead to:
Electric shock
Gas leak
Fire risk
Serious injury
A trained technician knows what to look for. They also follow safety steps and carry insurance.
👉 Best rule: If it feels unsafe, it is unsafe.
2) Professionals diagnose the real problem (not just the symptom)
DIY repairs often start with guessing. You might replace a part… and the appliance still won’t work.
Professional appliance technicians use:
Testing tools
Error code checks
Brand-specific knowledge
That means they fix the real cause, not just what seems broken.
👉 Accurate appliance diagnosis saves time, money, and headaches.
3) You protect your warranty
Many appliance warranties have one big rule: Repairs must be done by a licensed professional.
If you do a DIY repair, you may void your warranty. That can cost you later.
Most reputable repair services also give a parts + labor guarantee. That extra coverage matters.
4) You save money over time
DIY looks cheaper at first but it can get expensive fast.
Common DIY costs:
Buying the wrong part
Damaging wires or sensors
Breaking clips or panels
Needing a bigger repair later
On the other hand, professional repair can restore proper performance, help the unit run efficiently, and extend the life of the appliance.
That can also reduce energy waste.
5) Professionals use the right parts
Appliances work best with the correct parts.
Professionals can source:
OEM parts (manufacturer-approved)
Correct part numbers for your model
Quality replacements that fit properly
Wrong parts, on the other hand can cause poor performance, repeat breakdowns, and more internal damage.
What Appliance Problems Can You Fix Yourself?
Not every issue needs a technician. Some fixes are safe and simple — and they can solve the problem in minutes.
1) Power reset (appliance not turning on)
Applies to: Refrigerator, Washer, Dryer, Dishwasher, Microwave, Oven (electric), AC unit
Common signs: No lights, no sound, buttons not responding
✅ Try this:
Make sure it’s plugged in
Check the breaker box (a breaker may have tripped)
Unplug the unit for 60 seconds, then plug it back in
2) Clean or replace filters (weak performance, bad smell, slow drying)
Applies to:
Dryer → lint filter (clothes taking too long to dry)
Dishwasher → filter/drain screen (dishes still dirty, water not draining well)
Air conditioner (AC) → air filter (weak airflow, not cooling well)
Refrigerator → water/air filter (ice maker slow, water tastes bad, airflow issues)
💡 Quick tip: If the filter looks clogged or smells bad, clean or replace it.
3) Clean refrigerator condenser coils (fridge not cooling well)
Applies to: Refrigerator (only)
Common signs: Fridge warm, freezer not freezing, motor running nonstop
✅ Try this:
Unplug the fridge
Locate coils (back or bottom)
Use a vacuum or coil brush to remove dust
Dirty coils are one of the most common reasons a fridge starts losing cooling power.
4) Clear simple clogs (water not draining or appliance smells bad)
Applies to:
Dishwasher → drain/filter clog (standing water, slow drain, bad smell, not cleaning dishes)
Washing machine → drain pump/filter clog (won’t drain/spin, water left inside, bad smell)
✅ Try this:
Remove debris from the dishwasher filter
Rinse parts using warm, soapy water + a soft brush
Check for visible drain blockage (food bits, hair, lint)
5) Check door seals (leaks, weak cooling, heat escaping)
Applies to:
Refrigerator → warm fridge, condensation, leaking water inside
Dishwasher → water leaks around the door
Washer (front-load) → water leaks, mold smell around the seal
Oven → heat escaping, uneven cooking
✅ Try this:
Wipe the seal clean
Look for cracks, gaps, or loose edges
A damaged seal can cause leaks or poor performance even if the machine itself is fine.
When You Should Call a Professional Immediately
Some warning signs mean: stop and call a pro right away.
These problems can be dangerous, expensive, or both.
⚠️ Don’t DIY these appliance issues
1) Electrical danger (risk of shock or fire)
Applies to: Refrigerator, Washer, Dryer, Dishwasher, Microwave, Electric oven/range, Garbage disposal, AC unit.
Warning signs:
Sparks
Burning smell
Flickering lights when the appliance runs
Power turning on/off repeatedly
Buzzing sounds from inside the unit
What it usually means:
Damaged wiring
Short circuit
Faulty control board
Overheating component
✅ What to do: Turn it off, unplug it (if safe), and call a technician.
2) Gas-related problems (serious safety risk)
Applies to: Gas stove/range, Gas oven, Gas dryer.
Warning signs:
Gas smell
Stove clicks but won’t light
Flame is weak, yellow, or uneven
You feel dizzy or get headaches (possible gas exposure)
What it usually means:
Gas leak risk
Ignition failure
Burner or valve issue
Venting problem
✅ What to do: Don’t touch it. Ventilate the area and call a licensed pro.
3) Major parts that should NOT be DIY
These repairs require skill, testing tools, and proper installation.
Compressor problems
Applies to: Refrigerator, Freezer.
Signs:
Not cooling at all
Loud humming + no cooling
Fridge runs nonstop
✅ Requires sealed system work and correct parts.
Motor problems
Applies to: Washer, Dryer, Dishwasher, AC unit.
Signs:
Grinding noise
Drum not spinning
Weak performance or sudden stopping
✅ Motors often need disassembly + electrical testing.
Control board / electronics
Applies to: Refrigerator, Washer, Dryer, Dishwasher, Microwave, Oven, AC unit.
Signs:
Random errors on the display
Buttons not responding
Appliance acts “glitchy”
Stops mid-cycle
✅ Control boards are sensitive and expensive—wrong handling can damage more parts.
Wiring repairs
Applies to: All appliances
Signs:
Melted smell
Sparks
Appliance shuts off suddenly
Visible damaged cables
✅ Electrical work should be done by a technician for safety and insurance reasons.
4) Water leaks + electricity (risk of shock + hidden damage)
Applies to: Washer, Dishwasher, Refrigerator (especially ice maker), Water dispenser units.
Warning signs:
Water pooling under the appliance
Leaks from door or bottom
Wet floor + the unit still running
What it usually means:
Cracked hose
Drain pump issue
Door seal failure
Internal blockage or overflow
✅ What to do: Turn off power + water supply, then call a pro.
5) You tried a DIY fix and it didn’t help
Applies to: Any appliance.
Common examples:
You reset it, but it still won’t run
You cleaned the filter, but it still won’t drain
You replaced a part, and now it’s worse
✅ What to do: Stop there. Repeated DIY attempts can cause extra damage and raise the repair cost.
The Best Repair Is the One That Doesn’t Create a Bigger Problem
DIY repairs can be great for small issues.
But modern appliances are sensitive.
If the problem looks complex, the smartest move is to call a professional.
You’ll protect your home, your appliance, and your budget.
📖 You might also like to read: What Should You Look For in an Appliance Repair Company?
👉 Need a home appliance diagnostic and inspection? Call +18885085008 or book an expert with Fred’s Appliance Repair.
👉 Service areas: Charlotte, Raleigh, Durham, Cary, and Knoxville (North Carolina and Tennessee).

May 12, 2025
When your refrigerator stops cooling or your washer won’t spin, you do not have time to gamble on the wrong technician.
Hiring the right appliance repair company can save you money, time, and the headache of repeat breakdowns. However, with so many options available, finding a service you can trust can feel like stepping into a maze.
Why Should You Care About Hiring the Right Appliance Repair Service?
Choosing the right professional is essential for several reasons.
First, safety is a top priority, as appliances involve a dangerous mix of electricity, gas, and water.
Second, professional repairs protect your warranty, whereas DIY fixes can void it.
Finally, experts have the diagnostic tools and experience to fix the real problem quickly, ensuring long-term cost savings by preventing further damage.
To ensure you receive the best service, here are the essential traits you should look for when looking for appliance repair services.
What You Should Look For When Choosing an Appliance Repair Service?
1. Proper Licensing, Insurance, and Certification
A reliable company must hold the necessary licenses and certifications for your region. This ensures that technicians meet specific safety and performance standards. Furthermore, they should carry insurance to protect you if a technician is injured or if your property is damaged during the job.
Always ask for proof of credentials; reputable companies are happy to show them. Check if the technicians are factory-trained or certified by major manufacturers.
2. Broad Experience and Brand Expertise
Not all appliances are built the same. A high-quality company should have hands-on experience with a wide variety of brands—from Whirlpool and LG to high-end names like Bosch, Miele, or Sub-Zero. Technicians familiar with different manufacturers can diagnose problems faster and fix them correctly the first time.
Visit the company’s website to see if they list your specific appliance brand under their expertise. Ask if the technician has "seen it all" regarding your specific model so your home does not become a training ground.
3. Transparent and Upfront Pricing
No one likes hidden fees or nasty surprises on a bill. Trustworthy companies provide clear, upfront pricing before any work begins. They should also be honest about whether a repair is actually cost-effective or if you should consider replacing the appliance instead.
Ask about the diagnostic fee upfront. Some companies, like Fred’s Appliance, charge a flat fee for inspection and diagnosis, and it is credited toward the total repair cost if you choose to hire them.
4. Positive Local Reputation and Reviews
A company’s past performance is a strong indicator of your future experience. Local companies are often more invested in their community and motivated to maintain a strong reputation for repeat business.
Search for the company on Google, Yelp, or Thumbtack. Look for patterns in reviews, such as consistent mentions of professionalism, punctuality, and long-term reliability. Be cautious if there are repeated complaints about the same issue.
5. Fast Service and Flexible Scheduling
When an essential appliance like a fridge or oven breaks, you cannot wait a week for a fix. The best companies offer same-day or next-day appointments to handle urgent issues.
Check for availability immediately. Ask if they provide a specific service window for their arrival so you do not have to wait around all day.
6. Solid Warranties on Parts and Labor
A company that stands by its work will offer a warranty. This gives you peace of mind knowing that if the same problem returns shortly after the repair, you are covered without extra costs.
Confirm the length of the warranty. A standard window is often 30 to 90 days, while some companies may offer longer guarantees on specific parts.
7. Professionalism and Clear Communication
From the first phone call to the final follow-up, a company’s communication says a lot about its quality. They should confirm appointments, arrive on time (ideally in uniform), and explain the issue in a way you can understand.
Pay attention to how they handle your initial call. Do they return messages promptly? Can you speak to a real person?. A professional company should provide a detailed invoice or report once the job is done.
8. Well-Equipped and Prepared Technicians
Expert technicians should arrive with the right tools and commonly used parts to fix most problems during the first visit. This prevents unnecessary downtime while waiting for parts to be ordered.
Ask if they stock parts for your specific brand and model in their service trucks. Some local companies maintain a large, well-stocked warehouse to ensure faster repairs.
Key Takeaways
To solve the challenge of hiring the right specialist, you can use these multiple approaches drawing from the sources:
The Website Check: Verify brand expertise and local presence before calling.
The Interview Approach: Ask the technician direct questions, such as: "Would you repair or replace this if it were yours?" or "What can I do to prevent this from happening again?".
The Credential Verify: Request proof of licensing and insurance before letting anyone touch your appliances.
The Interaction Test: Judge the company based on their responsiveness and willingness to give a realistic arrival window.
👉 Need a home appliance diagnostic and inspection? Call +18885085008 or book an expert with Fred’s Appliance Repair.
👉 Service areas: Charlotte, Raleigh, Durham, Cary, and Knoxville (North Carolina and Tennessee).

Mar 8, 2025
A dishwasher that doesn’t clean your dishes can quickly disrupt your daily routine.
When a dishwasher is not washing dishes properly, it’s often a sign of underlying issues such as poor water circulation, mineral buildup, low water temperature, or worn-out components.
The good news: most dishwasher cleaning problems are easy to diagnose and fix, so you can get your dishes spotless again without spending hours scrubbing by hand.
7 Common Reasons Your Dishwasher Is Not Cleaning
Before you can fix the problem, you need to know why it is happening. Here are the most common dishwasher issues:
1. Blocked or Dirty Spray Arms
These arms spin and blast water at high pressure to remove food. Over time, bits of food, grease, or hard water minerals block the tiny holes, reducing the cleaning power to a gentle sprinkle.
2. A Filthy Filter
The filter traps food particles so they do not recirculate onto your clean dishes. When it is clogged, dirty water cannot drain, and you may find gritty residue on your plates.
3. Improper Loading
Overloading is a major mistake. If dishes are "nested" or stacked too closely, the water spray cannot reach every surface.
4. Low Water Temperature
Hot water is vital for breaking down grease and activating detergent. If the water enters at less than 120°F (49°C), your dishes will likely stay greasy.
5. Detergent Issues
Using the wrong type, poor-quality soap, or the wrong amount can leave a film or food residue.
6. Hard Water Minerals
If your glasses look cloudy or have white spots, you likely have hard water. This mineral buildup can also damage the machine over time.
7. A Dirty Interior
Soils, detergent, and minerals can build up on the walls of the machine itself, which eventually transfers back to your dishes.
How to Fix Common Dishwasher Problems Yourself?
Most dishwasher issues come from blocked water flow, weak spray, or poor detergent action. Below are quick DIY fixes that work for the most common problems.
1) Problem: Clogged spray arms — Solution: Clear the spray arms
When the spray arm holes get blocked with food bits or mineral buildup, the water can’t spray with full power. That leads to dirty plates, stuck-on food, and weak cleaning.
How to fix it (2 easy options)
Option 1: Manual cleaning
Remove the spray arms (check your manual if needed).
Use a toothpick, small brush, or thin wire to clear each hole.
Rinse well under warm water and reinstall.
Option 2: Vinegar soak (best for hard water)
Mix 1:1 warm water + white vinegar in a bowl.
Soak spray arms for 30 minutes.
Rinse and put them back in place.
2) Problem: Dirty filter system — Solution: Clean the filter
A clogged filter makes the dishwasher recirculate dirty water. This can cause bad smells, cloudy glasses, and dishes that still feel greasy after a wash.
How to clean the dishwasher filter?
Pull out the bottom rack.
Twist and remove the filter.
Wash it in warm, soapy water.
Scrub gently with a soft brush.
Rinse fully and reinstall it.
3) Problem: Dishes blocking water flow — Solution: Load dishes correctly
If dishes are packed too tightly or placed in the wrong spots, water can’t reach every surface. Sometimes a tall item even stops the spray arms from spinning, leaving half the load dirty.
How to load your dishwasher the right way
Top rack: cups, glasses, and plastics
Bottom rack: plates, pots, and pans
Always face dirty surfaces downward and toward the spray arms.
Don’t nest bowls or stack plates too tightly.
✅ Before closing the door: spin the spray arms by hand. If they hit a tall dish, rearrange the load.
4) Problem: Water too cold or pressure too low — Solution: Adjust temperature and pressure
Dishwashers need hot water to break down grease and activate detergent. If the water is too cool or the pressure is low, dishes come out dull, oily, or still dirty.
Fix water temperature
Run hot water from your kitchen tap for 60 seconds before starting the dishwasher.
This helps it fill with hot water right away.
Fix water pressure
Check the water supply line under the sink.
Look for kinks, bends, or blockages.
Straighten the line if needed.
5) Problem: Detergent not working well — Solution: Optimize detergent use
If you use weak detergent or have hard water, you may notice white film, water spots, or cloudy glassware. Some detergents also struggle with greasy dishes.
Simple upgrades that make a big difference
Switch to tablets or pods: often clean better than powder or gel.
Add rinse aid: helps prevent spots and improves drying (great for hard water).
Use dishwasher salt (if your model supports it):
Helps soften water and reduce cloudiness.
If glasses look cloudy or taste salty, check the salt lid is tight and the dispenser is filled correctly.
6) Problem: Grease and buildup inside the machine — Solution: Deep clean the dishwasher
Grease, soap scum, and minerals build up inside the dishwasher over time. This can cause bad odors and make your dishwasher clean worse, even if everything else looks fine.
Deep clean dishwasher in 2 quick steps
Step 1: Vinegar cycle (removes grease and buildup)
Put 1 cup of white vinegar in a dishwasher-safe cup.
Place it on the top rack of an empty dishwasher.
Run a full hot cycle.
Step 2: Baking soda refresh (removes smells)
Sprinkle baking soda across the bottom of the tub.
Run a short hot cycle.
When to Call a Professional?
If you have cleaned the filters, checked the arms, and adjusted your loading habits but your dishes are still dirty, the problem may be internal. A faulty inlet valve, heating element, or motor might be to blame. In these cases, it is best to schedule a diagnostic service with a certified technician
👉 Need a dishwasher diagnostic or repair? Call +18885085008 or book an expert with Fred’s Appliance Repair.
👉 Service areas: Charlotte, Raleigh, Durham, Cary, and Knoxville (North Carolina and Tennessee).

Feb 5, 2025
While it might seem like a small annoyance, that growing "ice cave" is actually a sign that your appliance is struggling. If your frozen peas are buried under a layer of frost, it is time to take action.
Defrosting your freezer is a vital step in maintenance that helps your machine run better and last longer. By following a few simple steps, you can banish the frost and reclaim your kitchen space.
🛠️ Need help with freezer repair in NC or Tennessee? Call +18885085008 or book an expert with Fred’s Appliance Repair.
Why You Must Defrost Your Freezer
You might wonder why you should bother with the mess of melting ice. Beyond just making more room for your favorite foods, there are several key reasons to clear out the frost:
Boost energy efficiency: Thick layers of ice act as insulation, making it much harder for your freezer to regulate its internal temperature. This causes the machine to work overtime, which significantly increases your energy bills.
Protect your food: Excessive frost buildup can compromise the flavor and quality of your food and is a leading cause of freezer burn.
Improve airflow: Ice can cover interior air vents and temperature sensors. When these are blocked, the machine cannot cool effectively.
Prevent appliance strain: When a freezer has to fight through heavy ice to stay cold, it puts extra stress on the motor and cooling elements, which can shorten the lifespan of the appliance.
Reclaim space: Frost takes up valuable room that should be used for groceries.
💡 Most experts recommend a manual defrost at least once a year or whenever the ice reaches one-quarter inch (7mm) in thickness.
How to Defrost the Freezer?
Defrosting is not a difficult task, but it does require some patience and planning.
What you’ll need before you start defrosting your freezer
You’ll need a cool place to store food and a few basic tools to help with melting and cleaning.
Essentials
Towels or rags to soak up water
Coolers (with ice) or another freezer to keep food cold
Wet-dry vacuum (optional, for removing water)
Other helpful items
Fan
Bowls or pans of hot water
Wooden spoon or plastic scraper
Hair dryer (for gentle use only)
Handheld steamer (optional)
Rubbing alcohol + a hot cloth (for thin frost)
For cleaning
Microfiber cloths
Bowl of warm, soapy water
Baking soda (to remove odors and freshen the freezer)
Step 1: Prepare and Remove the Food
Start by taking all the food out of your freezer. Defrosting requires raising the temperature above freezing, which can make food unsafe to eat.
If possible, plan ahead and eat through your freezer stock in the week leading up to defrosting so there’s less to move. For any remaining items:
Move food to another freezer or refrigerator, or
Store it in coolers packed with ice, or
Use a neighbor’s freezer temporarily to prevent thawing.
Step 2: Unplug the Unit and Protect the Area
Turn off and unplug your refrigerator/freezer (or switch off power at the wall). This is a vital safety step that also saves energy and helps ice melt faster.
Prop the door open to let warm room air circulate inside.
Lay towels, newspapers, or plastic liners on the floor in front of the freezer to catch melting water.
If your unit has a drainage hose, place the end into a low basin or bucket to catch runoff.
Step 3: Melt the Ice (Choose a Defrosting Method)
You can let the ice melt naturally, or use one (or a combination) of the methods below to speed things up.
The safest approach is to wait for the ice to melt down by its own. It's a slot but the safest method to defrost a freezer.
Leave the door open and let the ice melt on its own. This can take several hours but carries the lowest risk of damaging the appliance.
Faster methods to defrost a freezer are the followings:
Hot water bowls/pans: Place bowls or pans of boiling water inside (on a thick towel to protect shelves), then close the door. The steam loosens ice. Replace the water every 10–15 minutes as it cools.
Using a fan: Aim a stand fan so it blows warm room air into the open freezer. This speeds up melting with minimal effort.
Wet/dry vacuum: Useful for blowing warm air at thick ice and sucking up water and loosened ice chunks.
Targeted steam: A handheld steamer provides controlled heat for stubborn, thick frost buildup.
Using a hair dryer (use with caution):
Keep the dryer away from standing water, and keep the cord clear.
Aim warm air parallel to the wall to get heat behind the ice.
Never hold it too close to coils or plastic surfaces—high heat can warp or damage parts.
If the frost in your freezer is thing, you can use hot cloth and rubbing alcohol. For this, dip a rag in boiling water, add rubbing alcohol, and rub frost to loosen it quickly.
Step 4: Gently Scrape and Remove Ice (No Sharp Tools)
As ice softens, gently pry it off using:
A plastic scraper
A wooden spoon
A warm washcloth
Never use sharp metal tools like knives or ice picks. They can puncture freezer walls or damage cooling elements.
Step 5: Clean the Inside
Once all ice is gone, clean the interior to remove spills and odors.
You can use either of these (both work well):
Warm water + mild dish soap + a spoonful of baking soda, or
Baking soda solution: 1 tablespoon baking soda + 4 cups warm/hot water
Wipe down:
Walls, shelves, and drawers
Corners and seams
Door seals (grime often builds up here)
Rinse with clean water if needed, then dry everything completely with a clean towel. If the interior is damp when you turn it back on, new frost can form quickly.
Step 6: Turn It Back On and Reload
Plug the freezer back in and let it return to a safe temperature: around 0°F (-18°C).
Once it’s cold again, put food back in.
💡 Tip to reduce future frost: Don’t overpack the freezer—good airflow helps prevent frost from returning.
Need help with Freezer repair in NC or Tennessee?
👉 Need a freezer diagnostic or repair? Call +18885085008 or book an expert with Fred’s Appliance Repair.
👉 Service areas: Charlotte, Raleigh, Durham, Cary, and Knoxville (North Carolina and Tennessee).
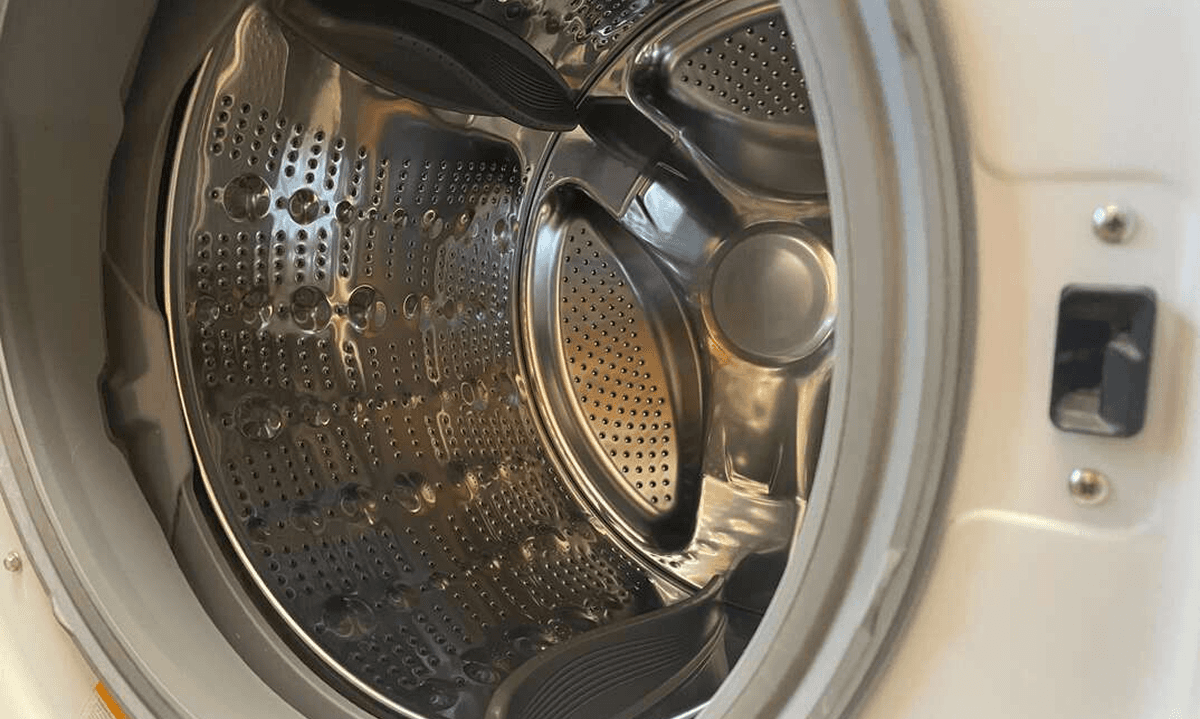
Jan 12, 2025
Ahhh. There’s nothing like the smell of clean, freshly laundered clothing. Each time you open the door and something stinky emanates from your front-loading washing machine, it can make you seriously wonder about the cleanliness of your clothing.
By understanding why your machine stinks and following a few easy steps, you can banish the smell for good.
Getting rid of that smell is easier than you think. With a few simple habits, you can keep your washing machine smelling fresh for good.
Here’s the why and advice on how to fix it.
👉 Need a washer repair in NC or TN? Call +18885085008 or book an expert with Fred’s Appliance Repair.
7 Reasons Why Front-Loading Washing Machine Stinks
Front-load washers save water and energy, but they also hold in moisture. When moisture mixes with leftover soap, dirt, and lint, bacteria and mold can grow. That growth is what causes the bad smell.
Here are the most common reasons a front-load washer smells:
1. Mold and mildew buildup
Mold loves warm, wet, dark places. In a front-loader, it often grows inside the door seal and in the detergent drawer. If you close the door right after a wash, the moisture stays trapped and mold grows faster.
2. Detergent and fabric softener residue (“gunk”)
Using too much detergent or softener can leave a sticky coating inside the machine. This film catches lint and dirt. Bacteria feed on it, which leads to a sour or musty odor.
👉 Read more: How Can Detergent Damage Your Washing Machine?
3. Dirty door seal (rubber gasket)
The rubber gasket has folds that hold water and grime. Hair, lint, and soap scum can hide there. When that mess stays wet, it starts to smell and can spread odor to your laundry.
4. Clogged drain/pump filter
Many front-loaders have a small filter that traps coins, lint, and hair. If it fills up, the trapped debris stays wet. Over time, it breaks down and produces a strong, dirty smell.
5. Standing water / poor draining
If the washer does not drain fully, a small pool of water can remain inside. That water turns stale after a day or two. You may notice the smell most when you open the door.
6. Trapped items (coins, socks, lint, etc.)
Small items can slip into the gasket folds or the filter area. If they stay stuck, they stay wet. Wet fabric, dirt, or paper can rot and cause a foul odor.
7. Too many cold-water cycles
Cold water does not clean away oily residue as well as warm or hot water. It also does not reduce germs as effectively. Over time, buildup stays in the machine and smells get worse.
How to Clean a Smelly Washing Machine?
Here are 3 methods you can use to clean a front-load washer and remove smells:
Method 1: Clean Washing Machine With Baking Soda and Vinegar
This is a safe and natural way to remove odors and dissolve dirt with basic home supplies.
Things you’ll need:
Baking soda
White vinegar
Sponge
Small brush, such as an old toothbrush
Steps:
Mix the solution: Combine 1/4 cup of baking soda with 1/4 cup of water.
Add the mixture to dispenser: Pour this mixture directly into the machine’s detergent container.
Add vinegar: Pour 2 cups of white vinegar directly into the empty washer drum.
Run the cycle: Set your machine to a high-heat cycle and run it completely without any clothes.
Final wipe: When the cycle ends, wipe the drum with a damp cloth to remove any remaining vinegar scent.
Method 2: The Bleach Deep Clean
If you have persistent mold or a very strong smell, bleach is a powerful disinfectant.
Check compatibility: Ensure your specific model allows the use of bleach, as some may not.
Add bleach: Pour 2 cups of liquid chlorine bleach into the detergent or bleach dispenser.
Run hot cycle: Use the hottest temperature and the longest cycle possible.
Optional soak: If your machine allows, pause the cycle for 30 to 60 minutes once the drum is full to let the bleach soak into all parts.
⚠️ Safety warning: NEVER mix bleach with vinegar or ammonia, as this creates toxic gas that can be lethal.
Method 3: Commercial Washing Machine Cleaners
For a convenient one-step fix, you can use products like Affresh or Tide Washing Machine Cleaner. Simply place the tablet or powder in the drum and run a "Clean Washer" or "BasketClean" cycle as directed by the packaging.
How to Clean Specific Components of the Washing Machine?
A drum cycle alone might not reach every stinky spot. You must also consider cleaning other components of your washing machine.
Scrub the gasket: Peel back the rubber folds of the door seal. Remove any trapped hair or coins, then wipe the area with a mix of equal parts vinegar and water or a mild soap. Use an old toothbrush to get deep into the crevices.
Wash the Dispensers: Remove the detergent drawer completely. Scrub it with warm, soapy water and a brush to remove all slime and buildup. Do not forget to wipe out the cavity where the drawer sits.
Clear the Pump Filter: Locate the access door for the filter, usually at the bottom front of the machine. Unplug the machine first for safety. Place a shallow pan down to catch excess water, unscrew the filter, and rinse away any trapped debris.
How to Keep Your Washing Machine Fresh All the Time?
Once your machine is fresh, a few small habits will keep it that way.
Leave the Door and Drawer Open
Moisture is the main cause of musty smells. After each wash, leave the door slightly open to let air flow. This helps dry the drum and stops mold.
Also, pull out the detergent drawer so it can dry too.
Wipe the Seal and Surfaces
A quick wipe keeps bacteria from growing. After laundry day, wipe the rubber door seal with a dry cloth. Get into the folds where lint and water hide. Clean the inside of the door and the drum rim as well.
Run a Monthly Cleaning Cycle
Once a month, run a hot empty cycle. Add a cup of white vinegar or a washer cleaner.
This breaks down soap scum and kills odor-causing germs. It also helps hoses stay clear.
Use the Right Detergent (and Less of It)
Follow the dosing lines on your detergent cap. Too much soap leaves residue that traps smells.
If you have an HE machine, use HE detergent in your front-loader. It makes fewer suds and rinses cleaner. Follow the dosing lines on the cap carefully; using too much soap leaves behind smelly residue
Skip Fabric Softener
Liquid softeners leave a film that promotes bacteria; consider using wool dryer balls instead.
Empty the Washer Promptly
Take clothes out as soon as the cycle ends. Wet laundry left in the drum will sour fast.
If a delay is unavoidable, run a short rinse again. This refreshes the load and the drum.
Clean the Drain Filter and Pump Area
Check your manual and clean the drain filter every few months. Lint, hair, and coins can hide there.
A clogged filter can leave standing water that smells. Keeping it clear improves drainage and freshness.
Keep the Area Around the Washer Dry
Humid corners often invite mildew. For this, always wipe up spills and splashes on the floor.
If the room is damp, use a small fan or dehumidifier. A dry laundry area helps a fresh machine.
Still can’t get rid of the smell?
If your washer still smells like sewage after a deep clean, the problem may not be the machine. It could be a plumbing issue, such as a blocked vent pipe, a clogged drain line, or a dry drain trap. For safety and to prevent water damage, it’s best to have a pro check it.
👉 Need a washer diagnostic or repair? Call +18885085008 or book an expert with Fred’s Appliance Repair.
👉 Service areas: Charlotte, Raleigh, Durham, Cary, and Knoxville (North Carolina and Tennessee).
